For most of us, hard drives store important files and data. However, these devices are vulnerable to damage that often results in data loss. Luckily, there are methods you can do to recover data from a crashed hard drive.
Difference Between Logical & Physical Damaged Hard Drives
Hard drives suffer from different kinds of damage. So if you want to recover data by yourself, you must first determine what kind of damage your drive has. This way, you can apply the appropriate solution and reduce the possibility of damaging the hard drive even more.
Generally, hard drive corruption can be categorized into two: logical and physical damage.
Physical Damage
If your hard drive has physical damage, it means that one or more of its mechanical or moving parts malfunctioned. This can be caused by physical impact, overuse, electric shock, and power surges among others. In this case, it can be difficult or sometimes even impossible to DIY broken hard drive recovery.
Physical damage can be in different parts of hard disk drives such as the disk head, platter, power connector, or others. Some indications of this kind of damage include the following:
- ? Slow loading times
- ? Inability to start your computer
- ⚠️ Computer crashes or freezing
- ? Clicking noises
Logical Damage
Logical damage can refer to any software-related hard drive issue. In this case, your hard drive’s mechanical parts are all functional, but its data may not be readable. However, it’s more often easier to recover data from damaged partition or drive with logical errors than those with physical damage.
Logical damage is usually evident when the data on your drive becomes inaccessible, there is data loss, or there are missing files. It can be caused by different circumstances such as a corrupted file system caused by bad sectors, viruses, driver problems, and interrupted data transfer among other reasons.
A hard disk drive suffering from logical damage often displays the following signs:
- ⛔ A partition or the whole hard disk drive is not accessible
- ❄️ Computer crashing or freezing
- ❌ Files are inaccessible
Classifying your hard drive error can help you apply the right fix for your issue. Additionally, it’s helpful to know if your HDD is either damaged, corrupted, or dead:
- ? Damaged hard drive – A damaged hard drive is usually a hard drive suffering any physical malfunction. It’s much harder to recover data from failed hard drive, especially if a vital part of your drive was damaged.
- ❗ Corrupted hard drive – corrupted hard drives suffer from any logical damage like virus infection, file system corruption, etc. In this scenario, data recovery has a better chance to succeed. However, it is recommended that you back up and scan your drive as soon as you can.
- ☠️ Dead hard drive – Your hard drive can be considered dead if your PC can no longer read it. Your computer will crash or get stuck in booting trying to detect a hard drive. In this case, we recommend you consult with a data recovery expert to attempt to recover your lost files. Any effort to DIY data recovery might risk your drive to further and irreversible damage.
Recover Data from a Crashed Hard Drive Using Data Recovery Software
Using a hard drive data recovery app to retrieve your files is the best solution at your disposal. To ensure successful data recovery, we also recommend you follow these tips before scanning your drive with recovery software:
What to do when a hard drive is crashed?
- ⛔ Stop using your hard drive – HDDs store data by mechanically rotating their arm around the disk. Continued use of your hard drive will increase the probability of your deleted files being overwritten by any new data processed by your drive.
- ? Carefully check for physical damage – If you’re checking for physical damage, make sure not to mishandle your hard drive. Any additional physical impact might make it harder for data to be recovered.
- ? Run data recovery software as soon as you can – Immediately perform data recovery if you can to increase the chance of successful data retrieval. Additionally, do not save your recovered files on the same affected hard drive.
- ☎️ Contact a professional for physically damaged disks – If you are not knowledgeable on how an HDD works, we don’t recommend you to DIY or even take apart your drive and attempt to fix it. Instead, we encourage you to get a data recovery professional service. You can also check how much it costs to have a hard drive recovered on average to avoid getting scammed.
Successful data recovery from HDD also heavily relies on the software you choose. The following are some of our top picks for data recovery. We chose these apps based on our overall experience in using them, as well as their relevant features, reliability, and user-friendliness, among other factors.
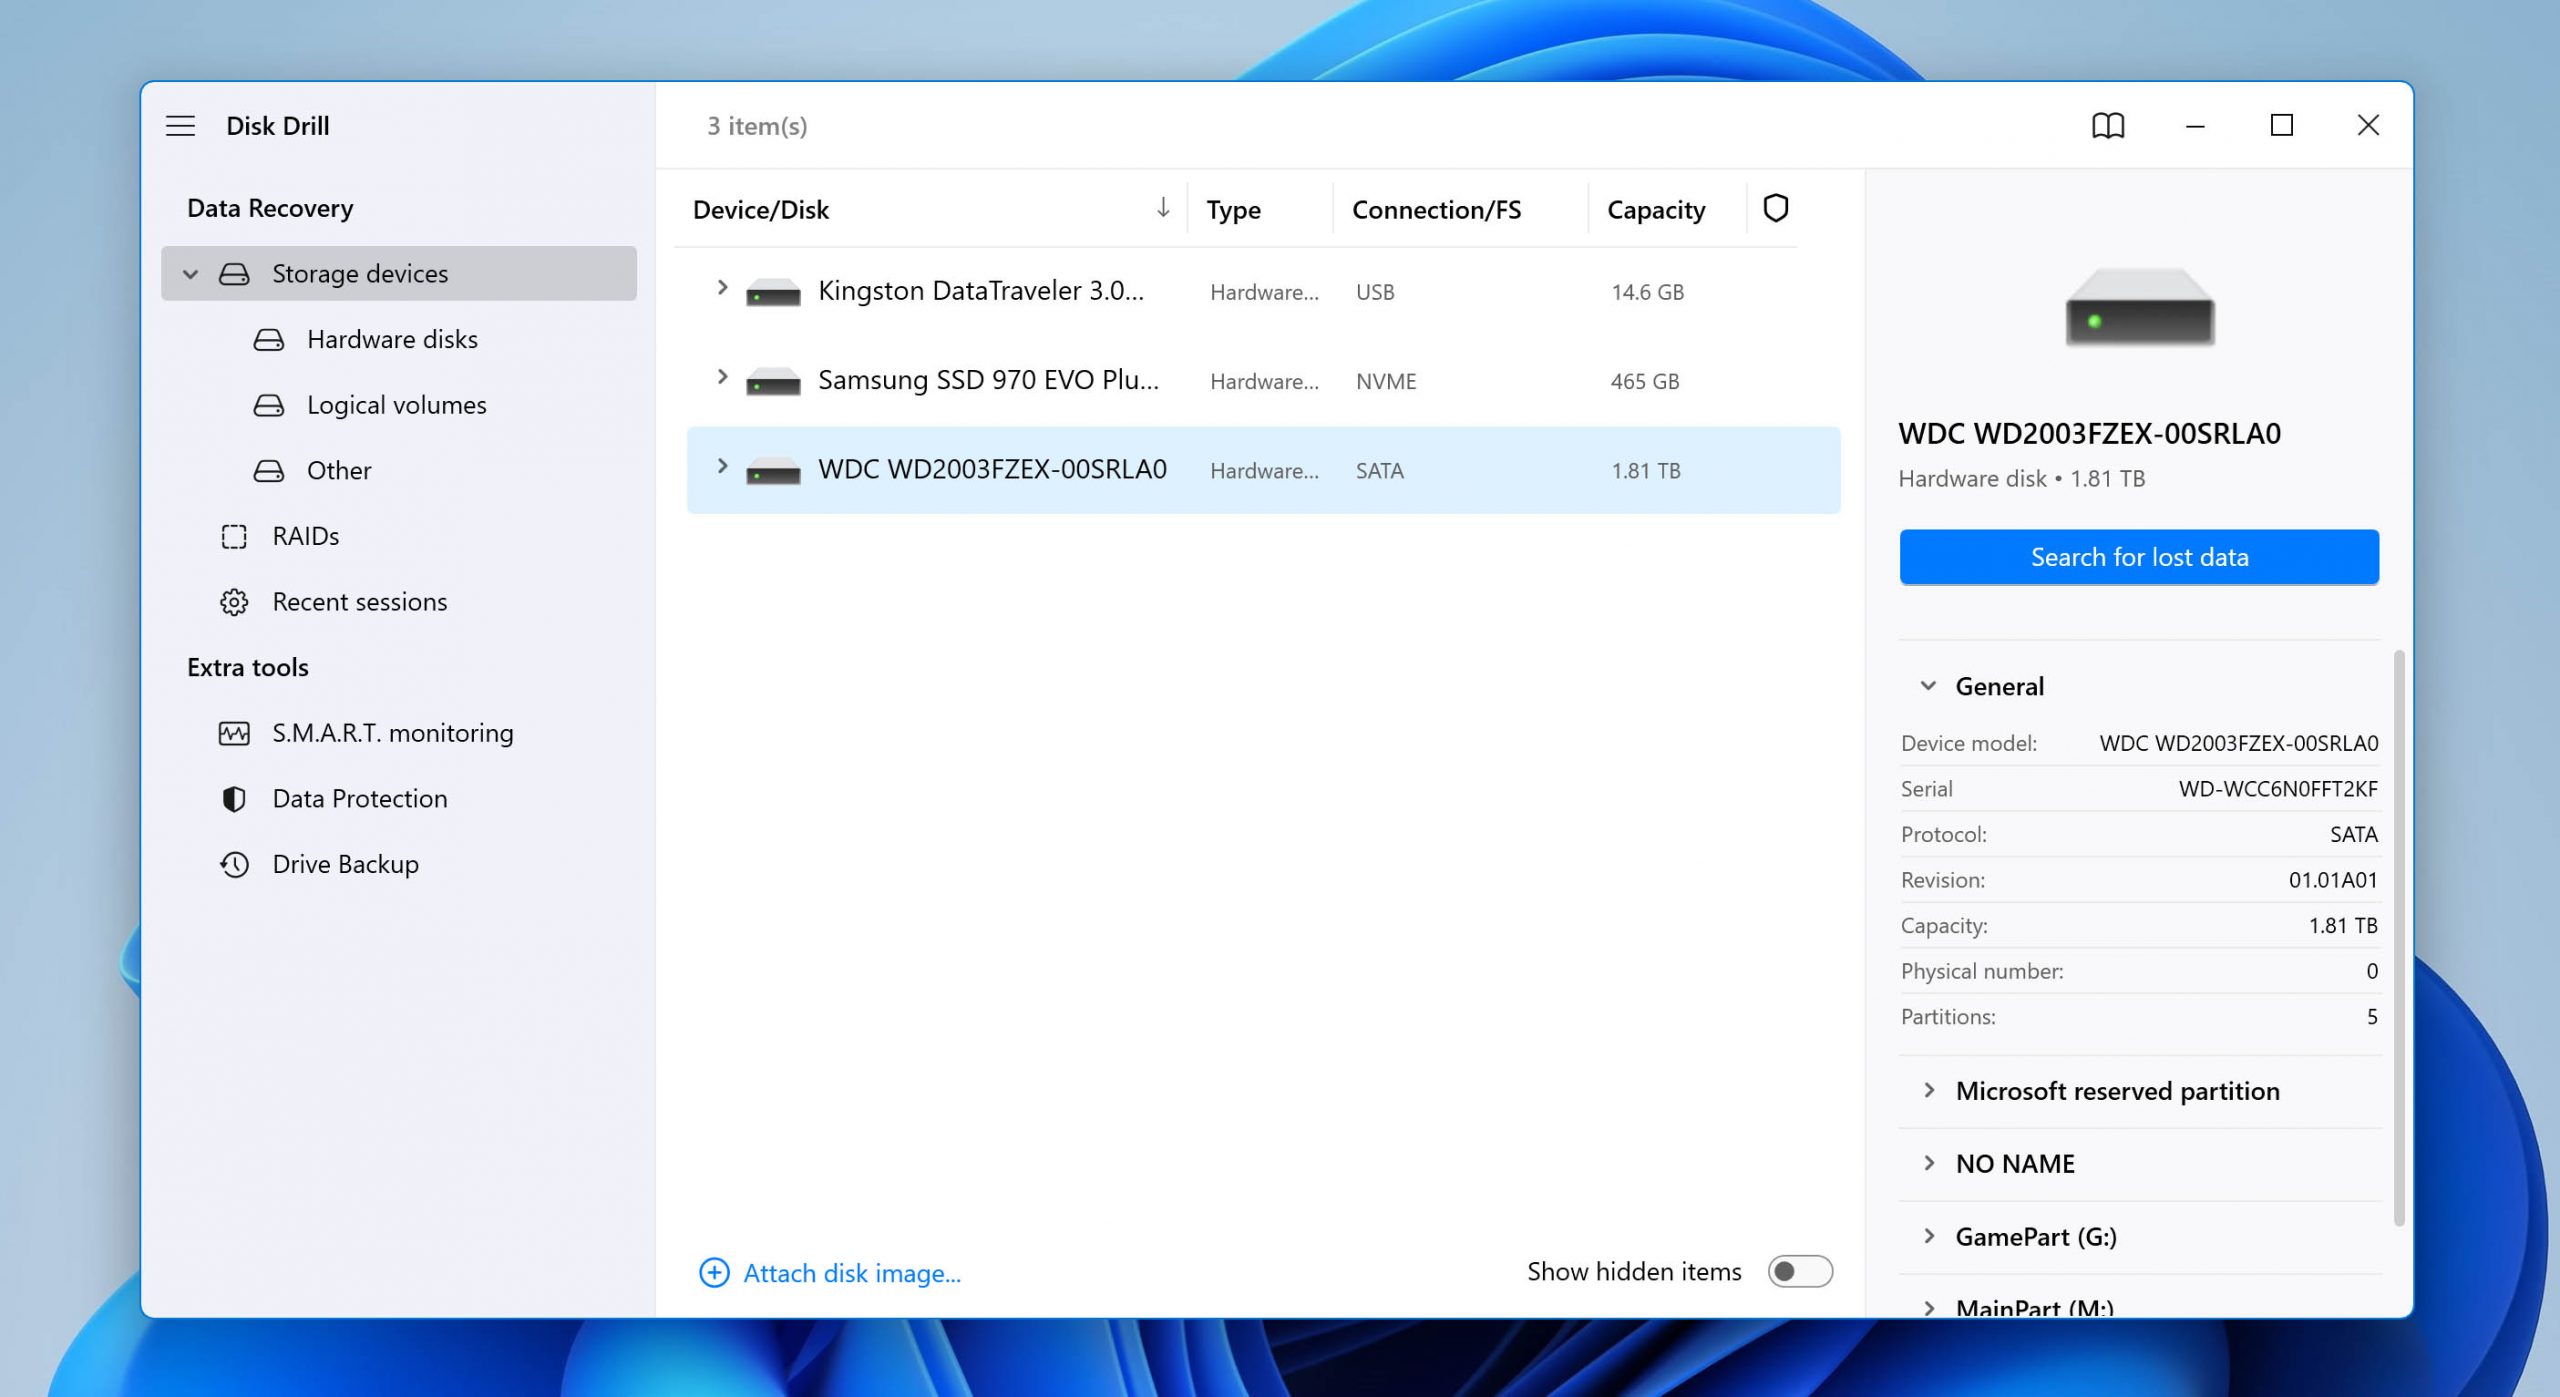
1. Disk Drill
Disk Drill is a beginner-friendly data recovery software. It’s a trusted app that can recover crashed HDDs on Mac and Windows. It can read and scan file systems such as NTFS, FAT32, exFAT, APFS, and ext2/ext3/ext4.
Aside from Disk Drill’s modern and dynamic interface, you will also find it easy to follow along because of the tips and guides that pop up when you first open the app. Using its option to back up your drive, you can safely perform hard drive recovery.

✅ Pros
- More than 400 file types are scannable and recoverable
- Reliable and consistent with scan results
- Ability to preview results while scanning
- Modern and user-friendly interface
- Ability to back up your drive/partition
? Cons
- The free version can only recover up to 500MB worth of files on Windows
2. Recuva
Recuva has a much simpler approach to data recovery. While it uses a slightly outdated interface, its data recovery capability is still reliable. Plus, you have access to all of its features even by just installing the free version.
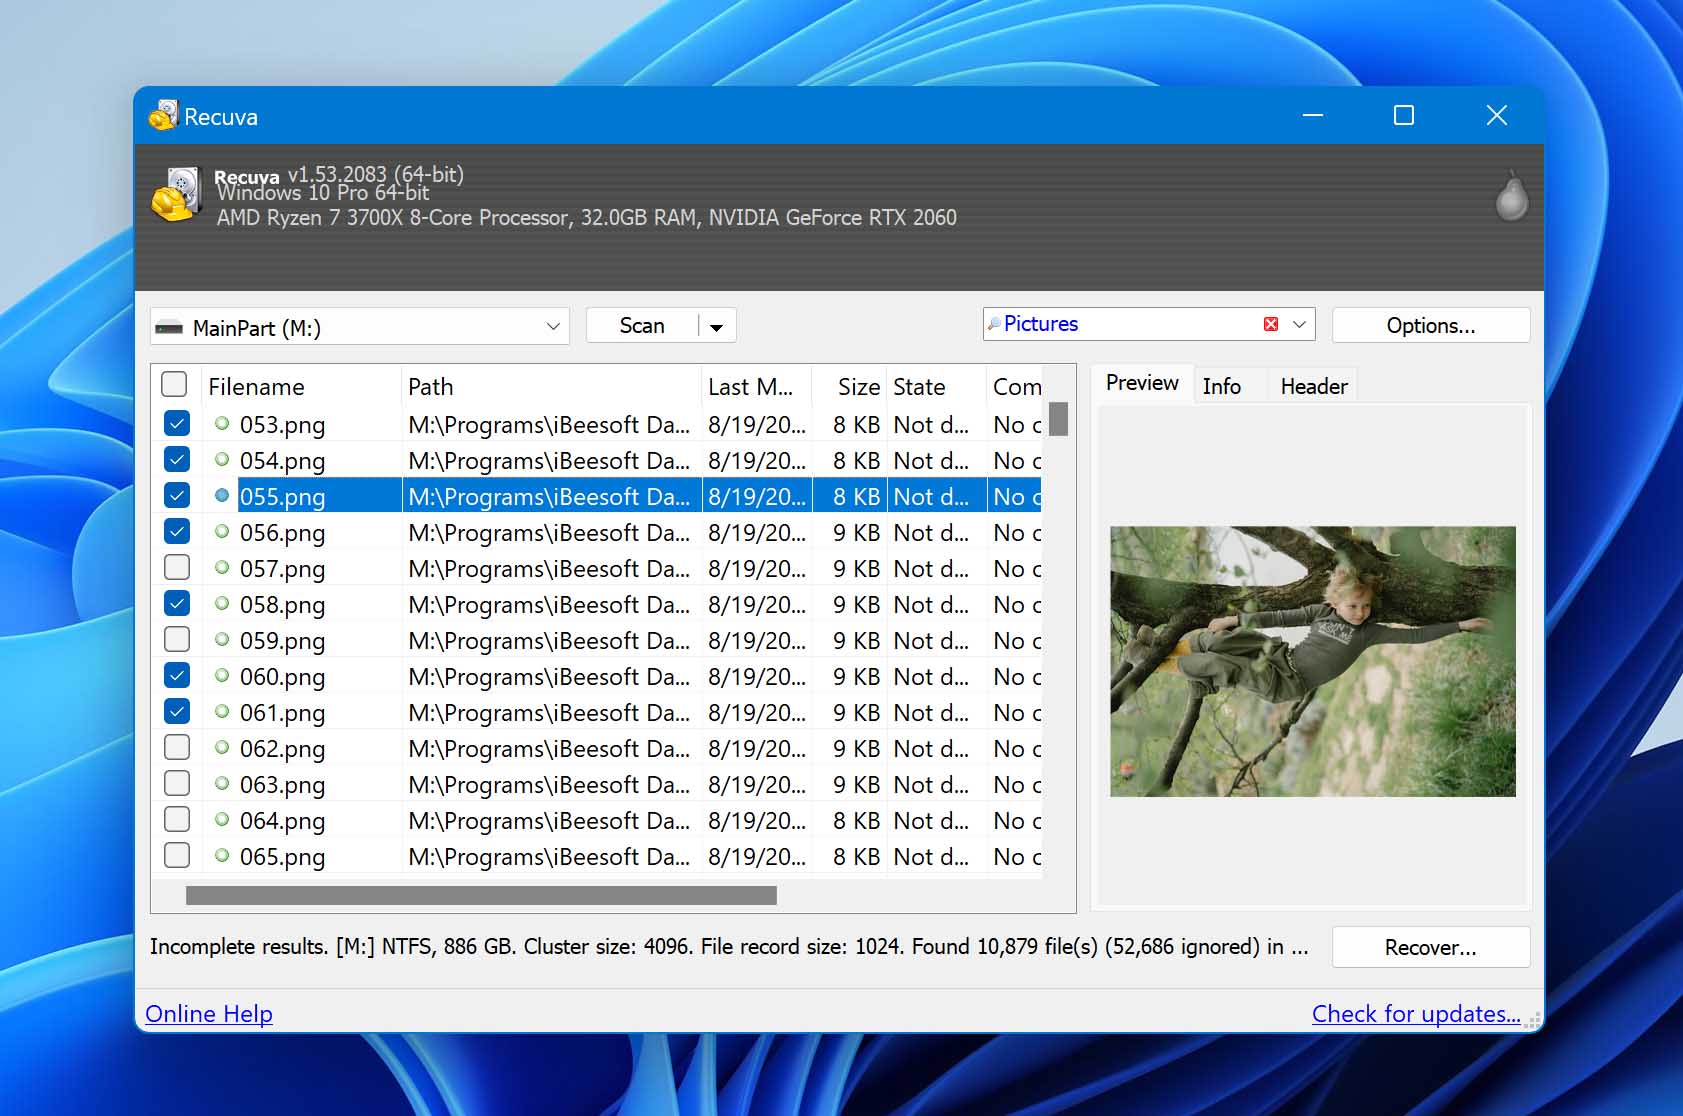
✅ Pros
- All pro features are available in the free version
- Fast basic scans
- The easy-to-follow data recovery process
- Can recover unlimited files
? Cons
- Cannot resume scan of failing drives
- Scan results contain irrelevant and confusing file types
3. R-Studio
R-Studio is a powerful professional data recovery tool. It has a comprehensive set of features while giving access to all the nerdy details of your drives. However, it has a more complex interface that’s sometimes confusing for beginners or casual users. It also has a relatively steep learning curve.
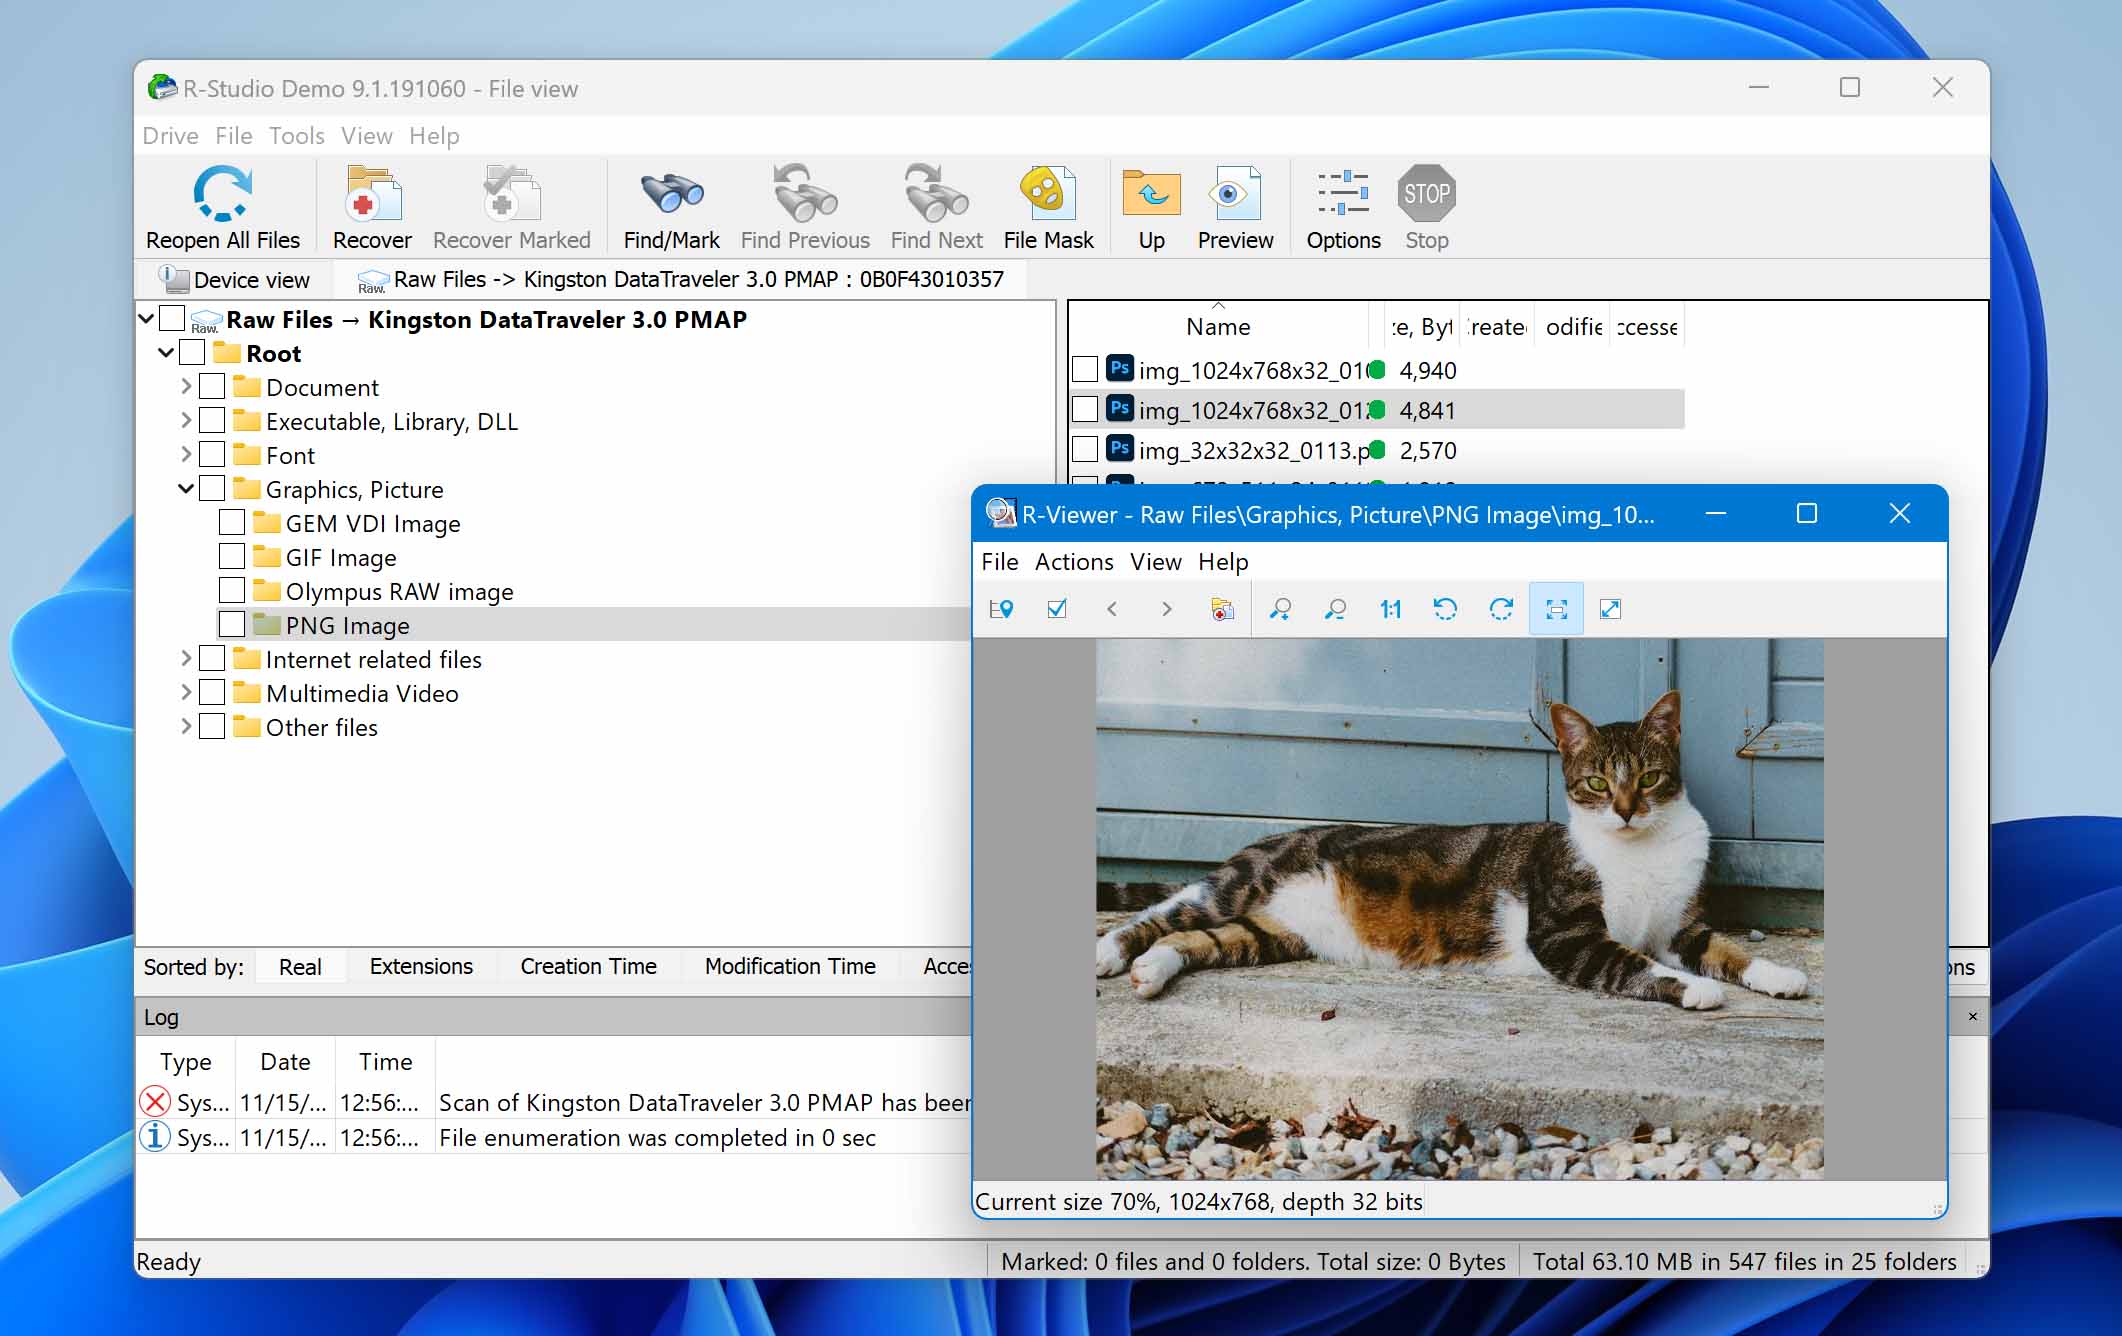
✅ Pros
- Can recover 468 file formats
- Comprehensive features
- Advanced recovery algorithm
- Disk image creation
- Remote data recovery for computers in the same network
? Cons
- Not completely free (With a $49.99 one-time payment for Windows and a $79.99 payment for Mac and Linux)
- Complex interface and steep learning curve
- A free trial can only recover up to 256KBs files
Using Disk Drill for Hard Drive Data Recovery
You can use any of the data recovery software we previously listed to get back your files. In the following example, we chose to use Disk Drill to demonstrate the backup and recovery process because of its usability and reliability for HDD data retrieval.
Checking your hard drive
In contrast with the usual data recovery process where you only need to run the software and follow the recovery process, a hard drive crash recovery will require the following initial steps:
- Download data recovery software on another computer.
- Connect HDD to the extra computer internally or with an HDD enclosure case to function as an external drive.
- Make sure your hard drive is accessible.

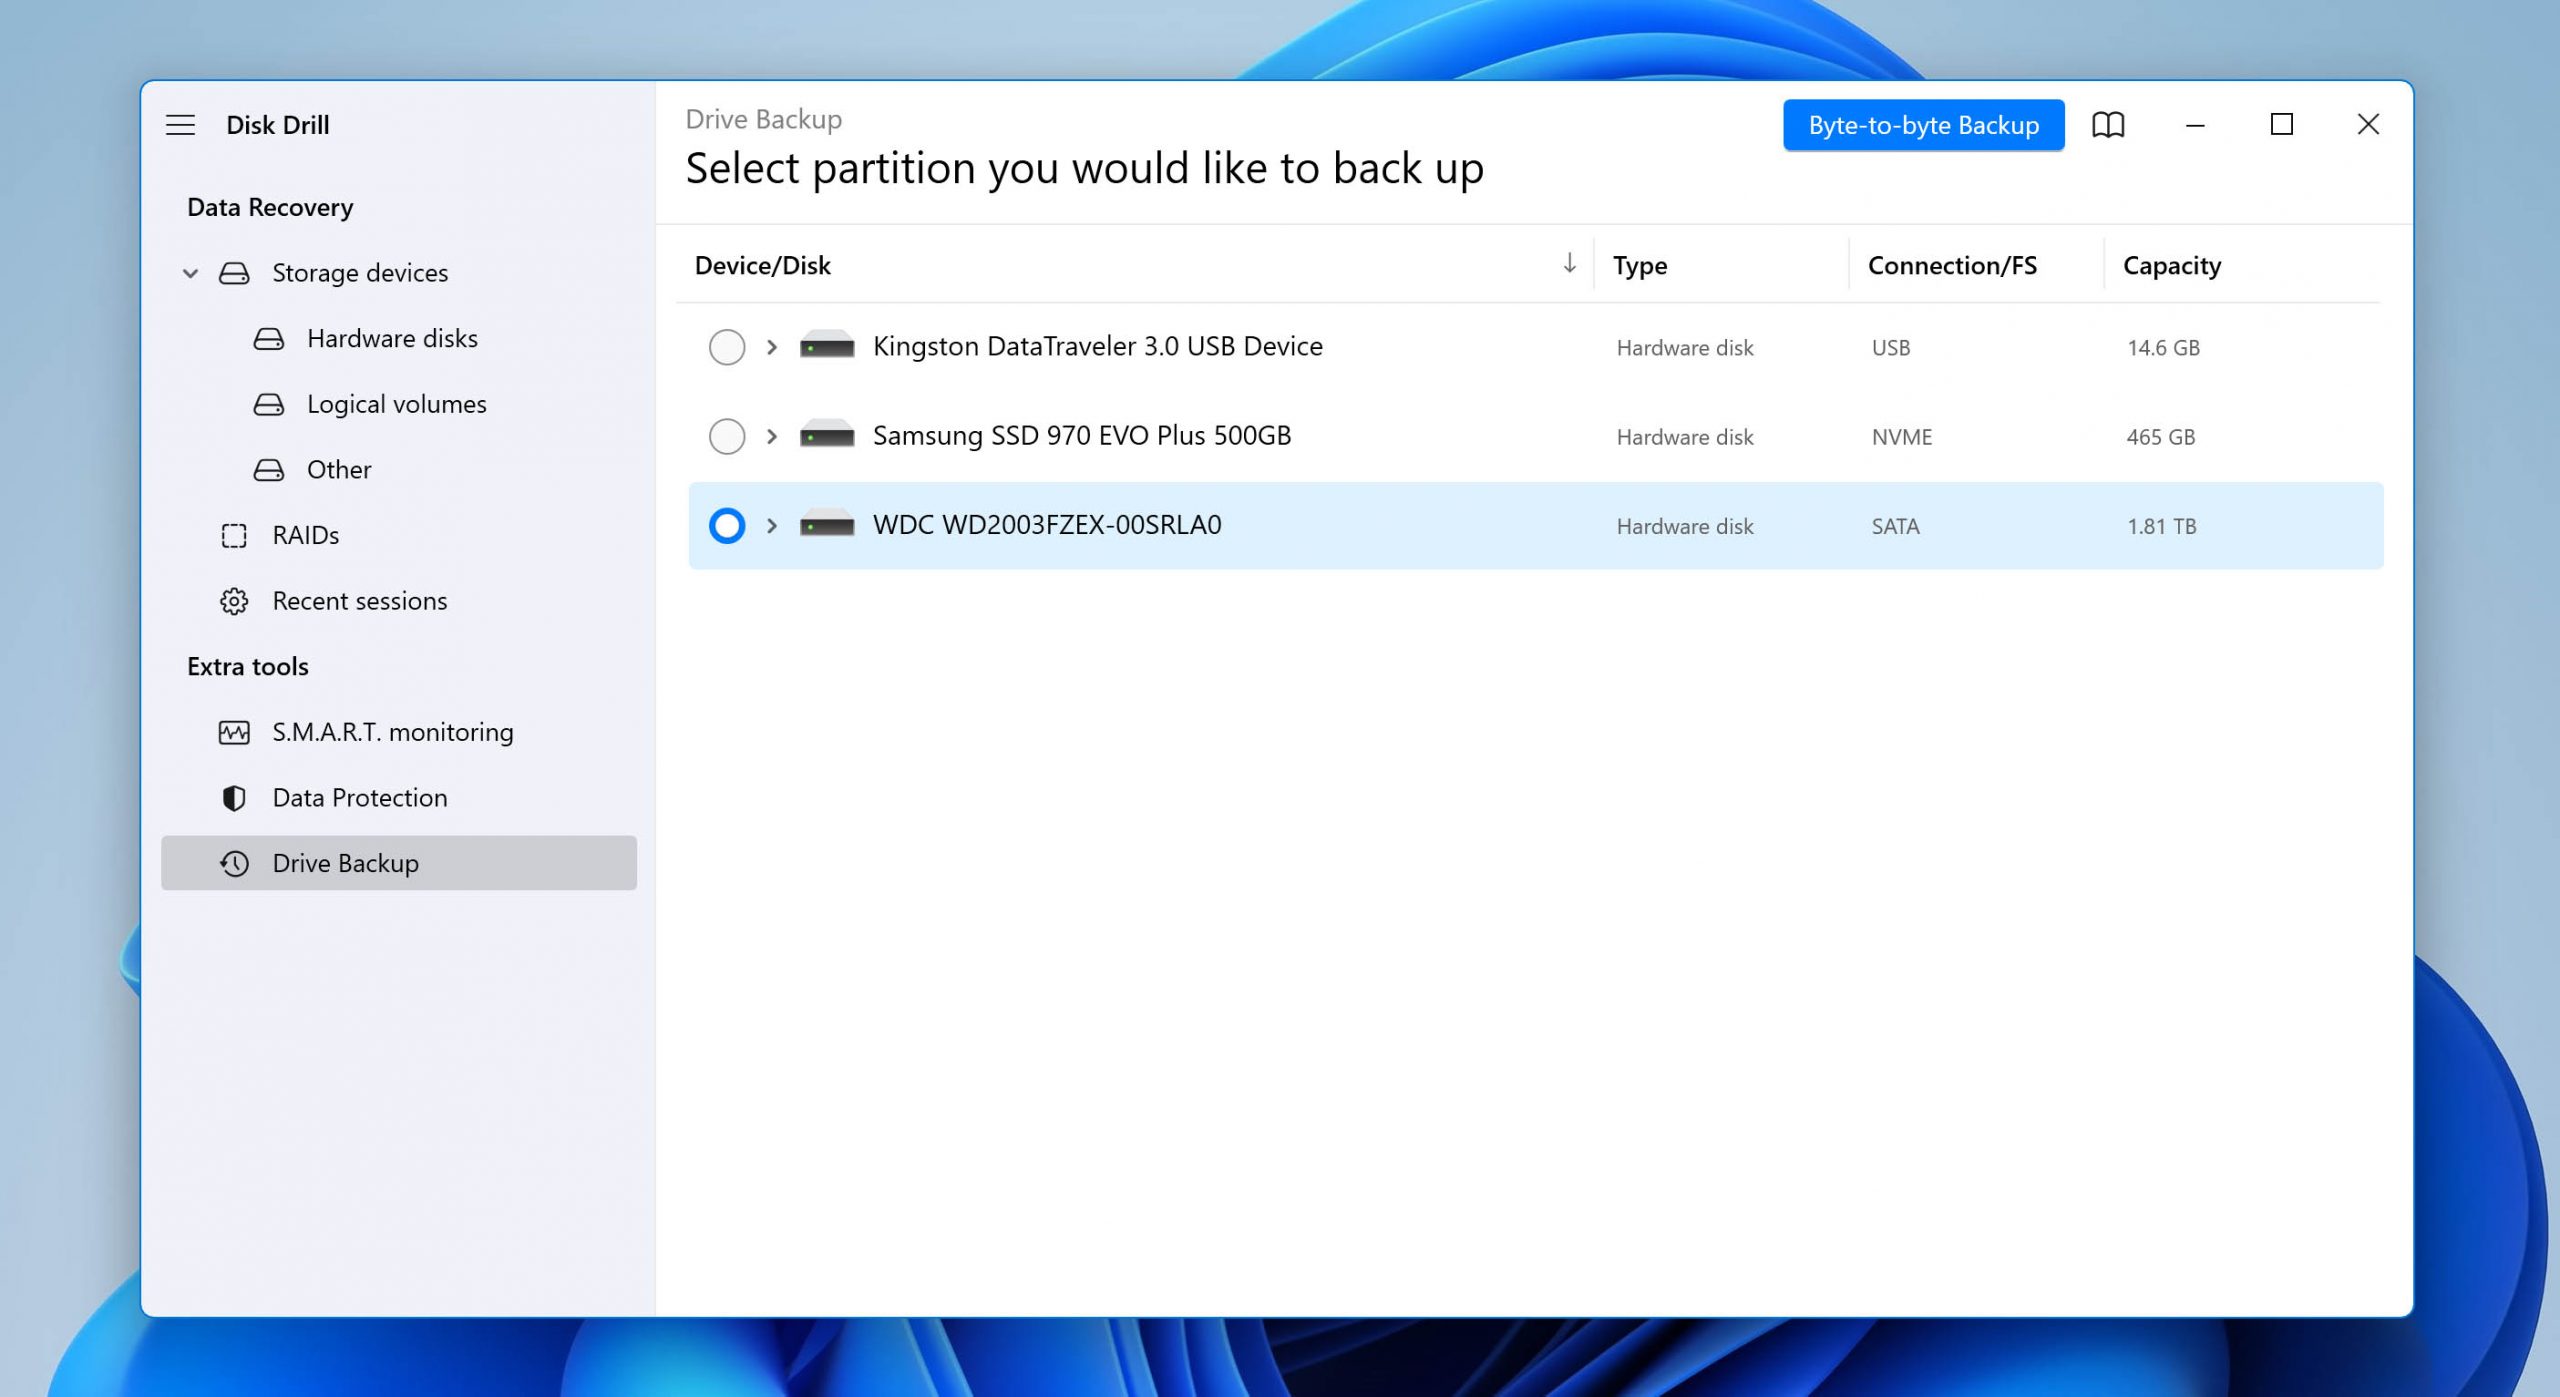
Backing up your HDD
It is important to back up your hard drive before data recovery so any attempt at retrieval will be performed in the mirrored disk. To back up your drive using Disk Drill, follow these steps:
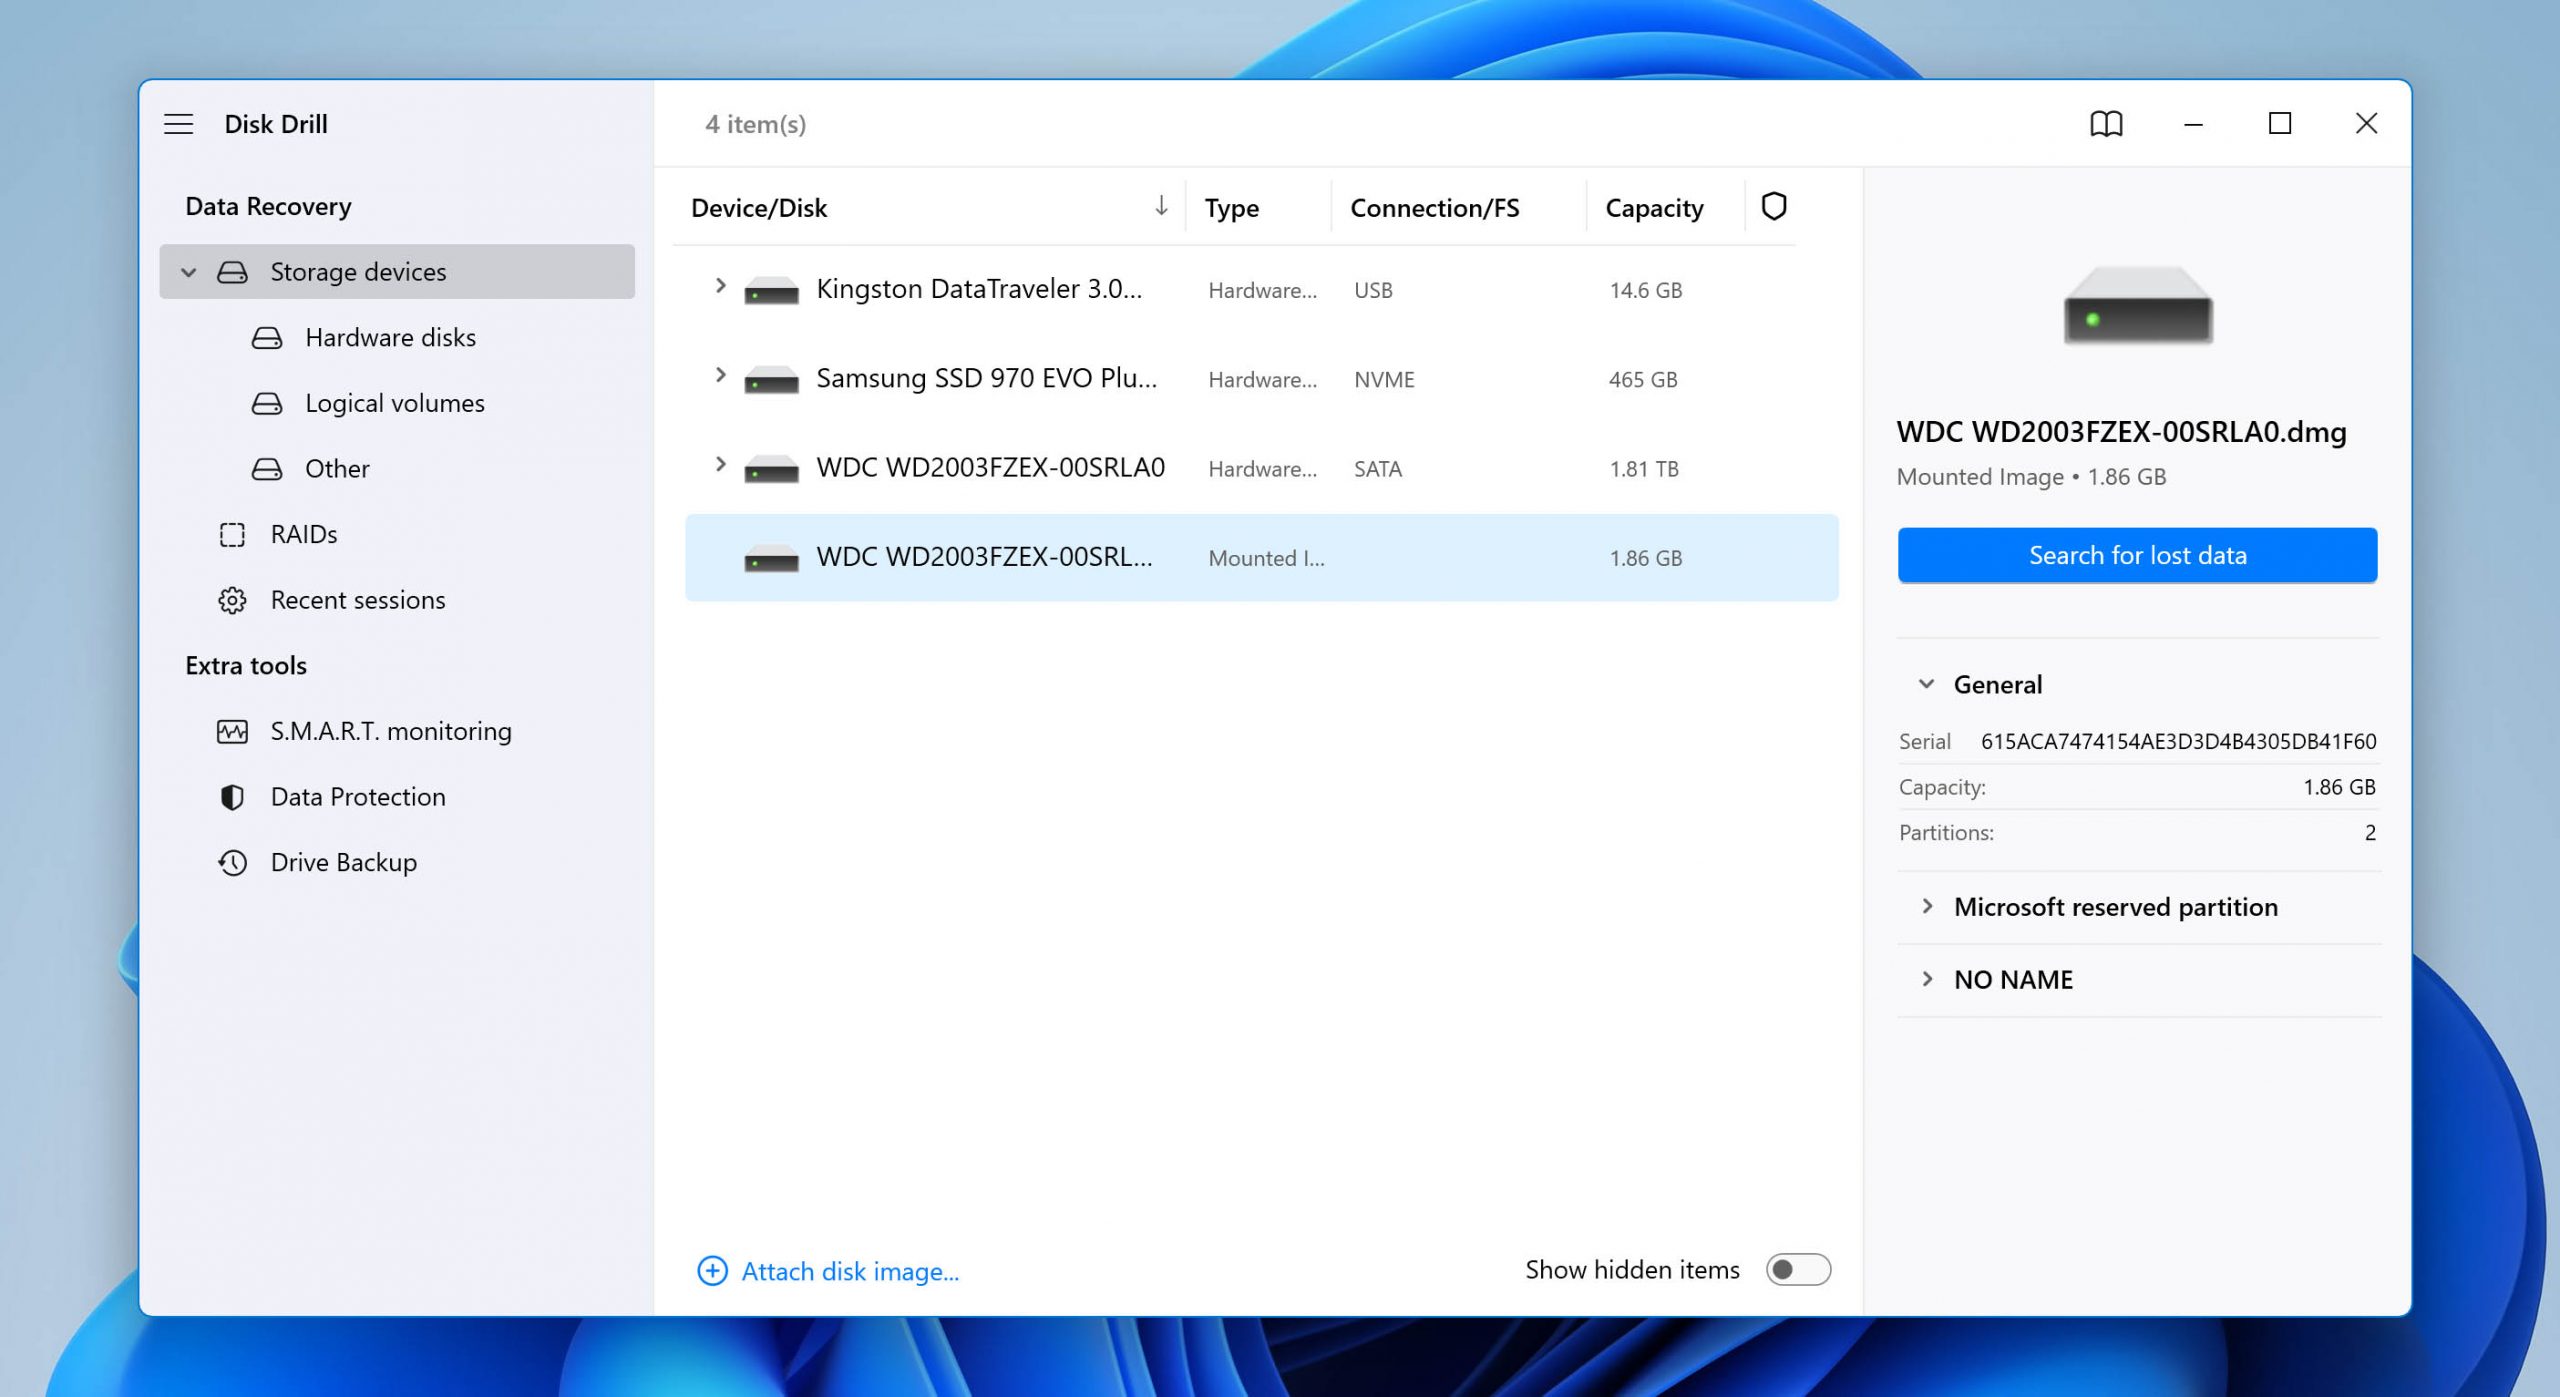
To get started, open Disk Drill.
- Click on the Drive Backup option in the navigation bar.
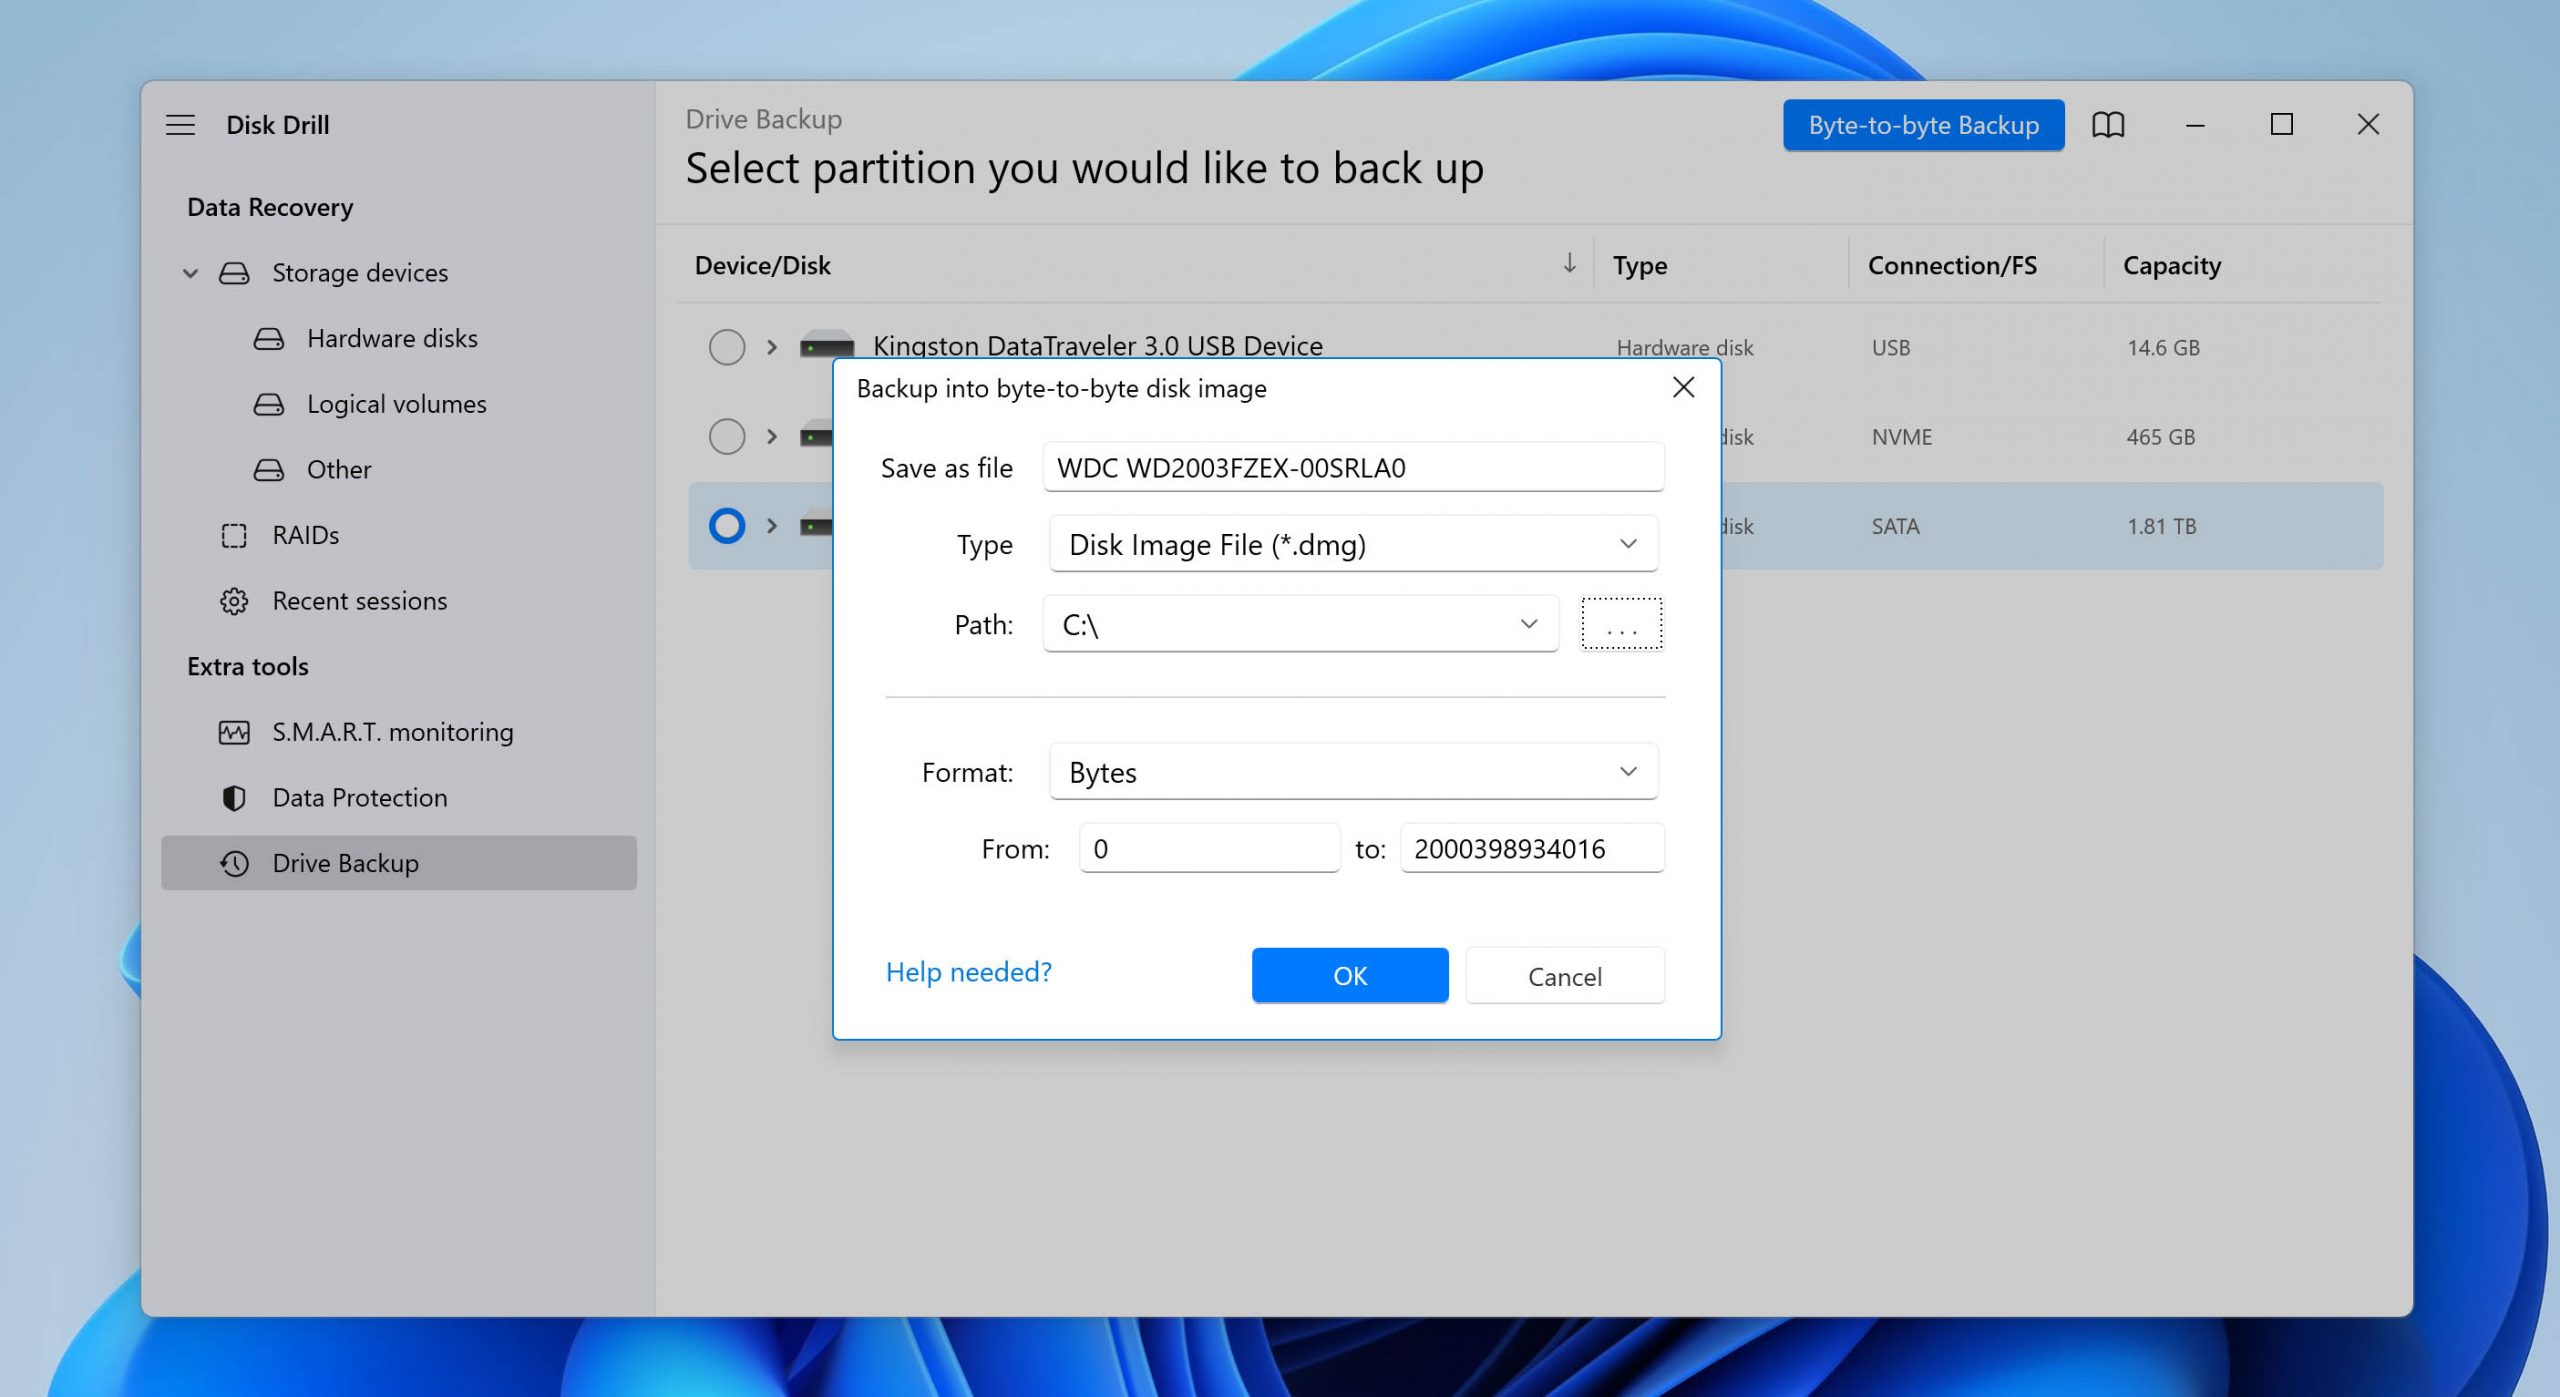
- Select your failed hard drive. Then, click on the Byte-to-byte backup button on the top-right corner.
- Choose a storage location for the disk image. Make sure that the location has enough space.
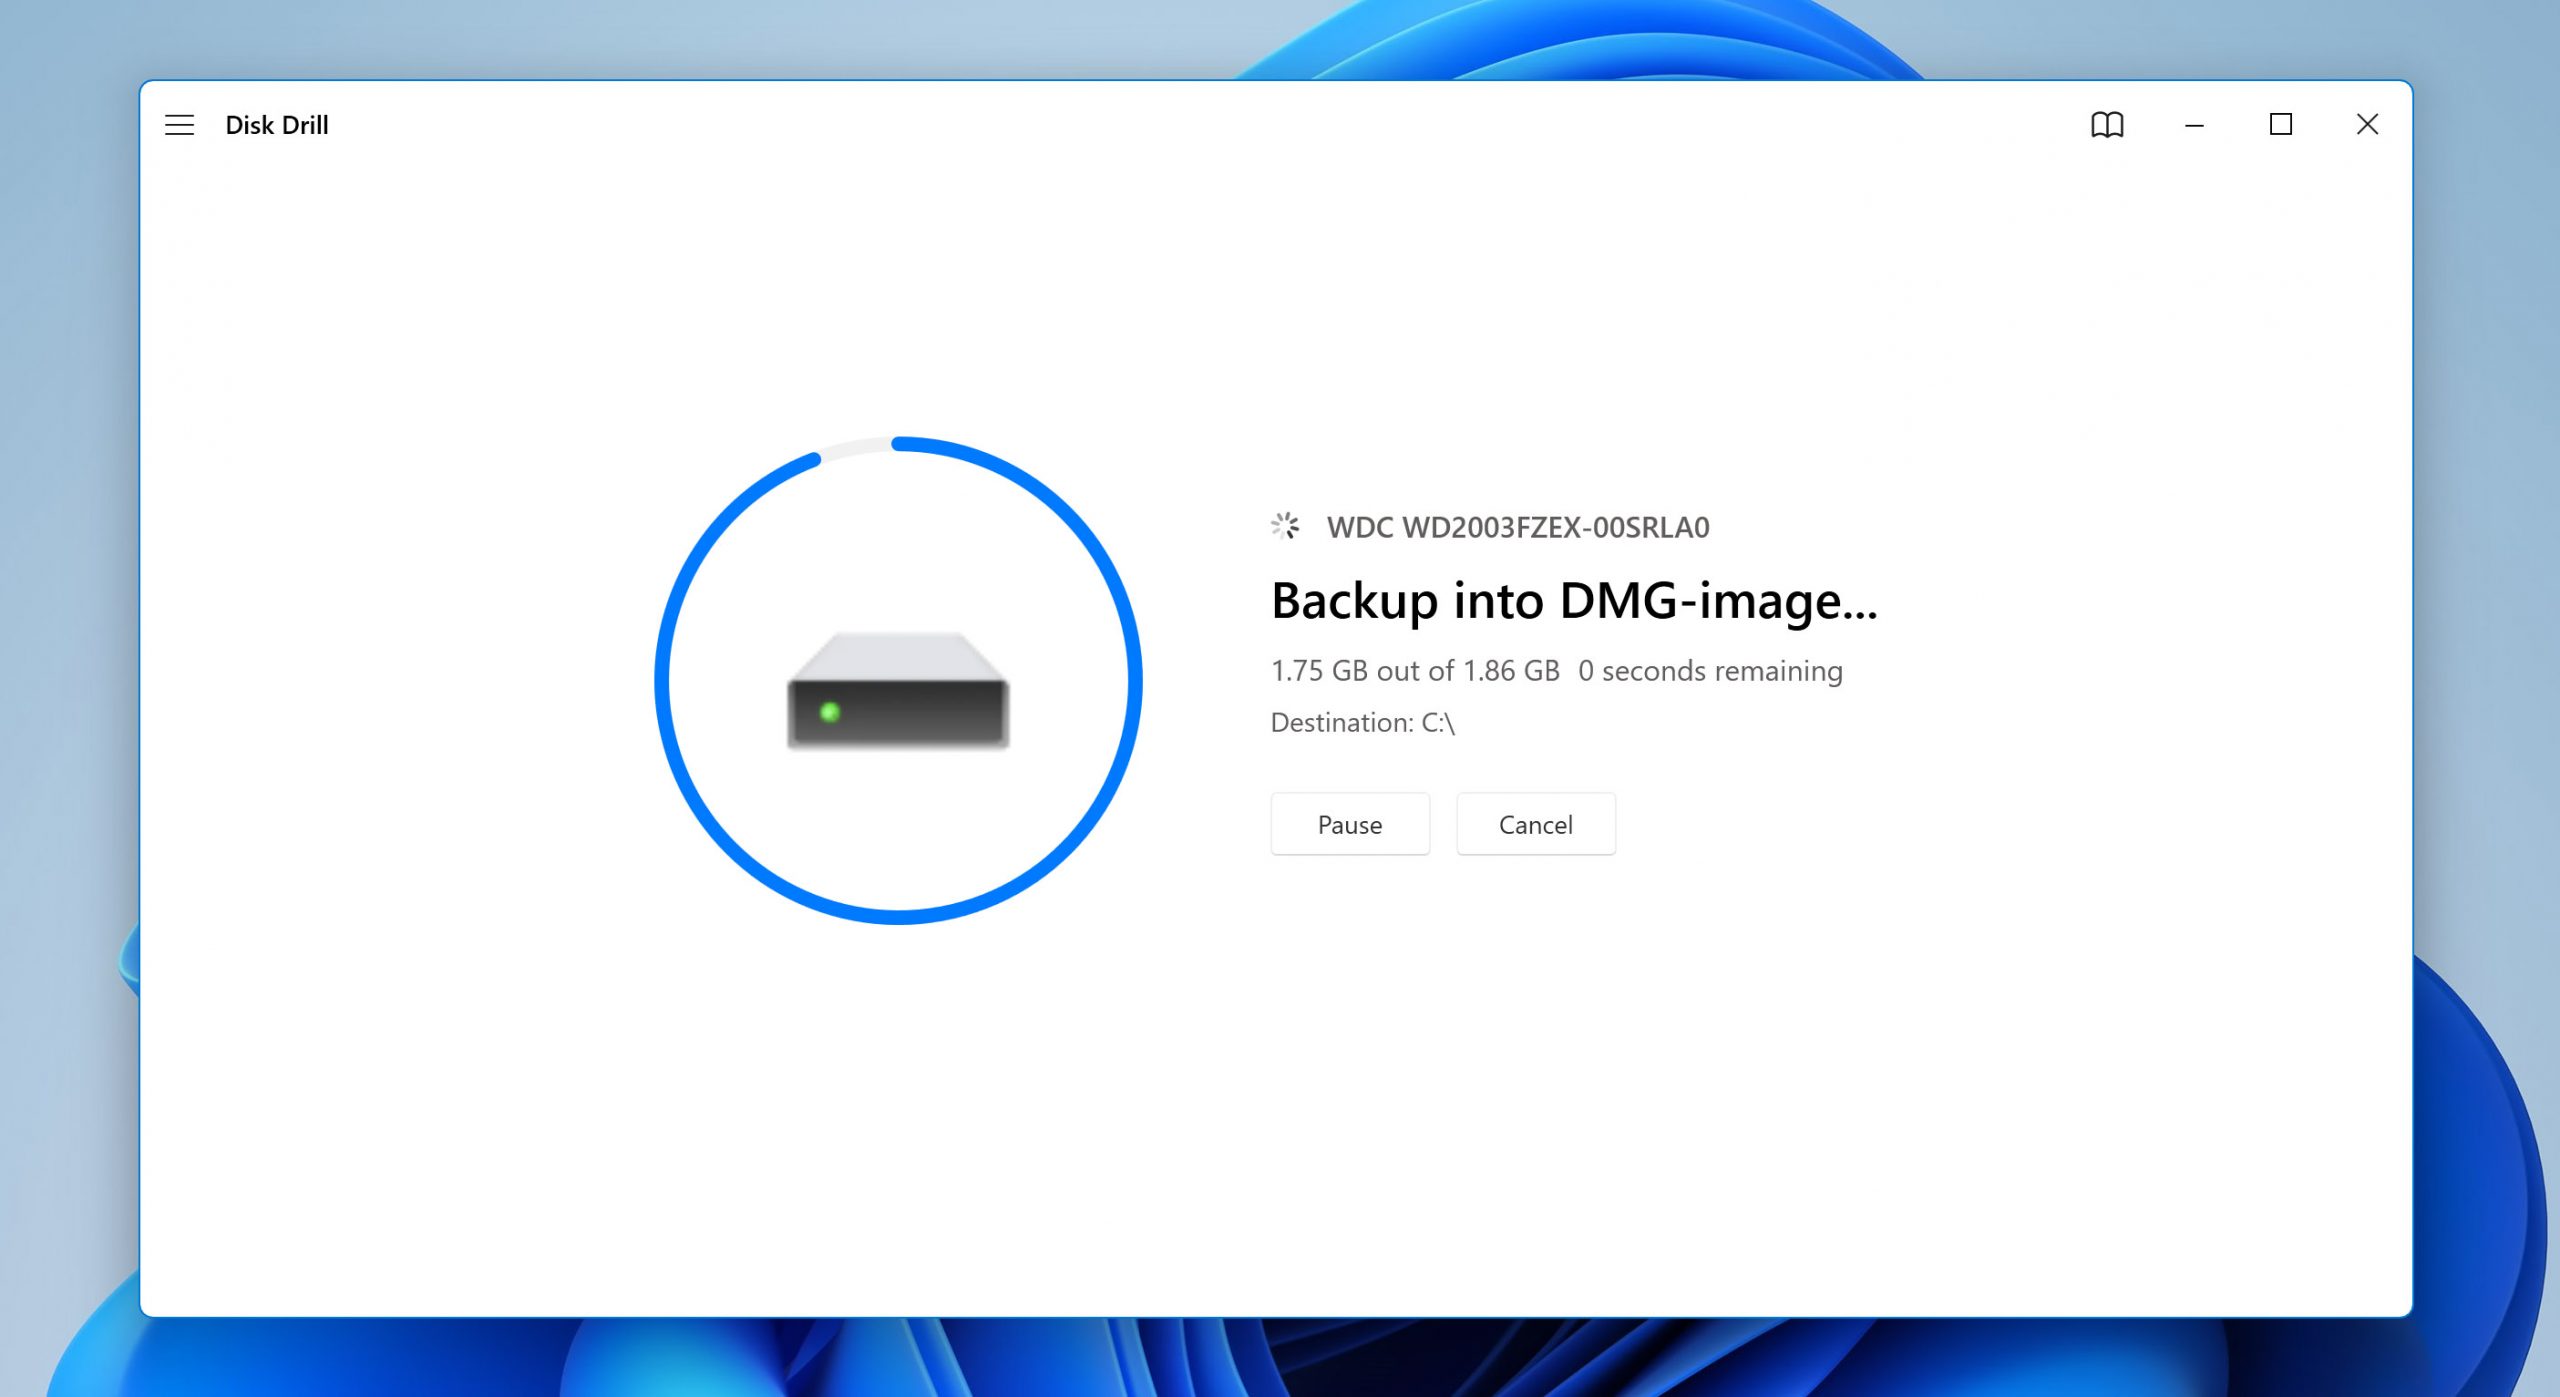
- Finally, wait for Disk Drill to finish creating the disk image.
Scanning your crashed hard drive
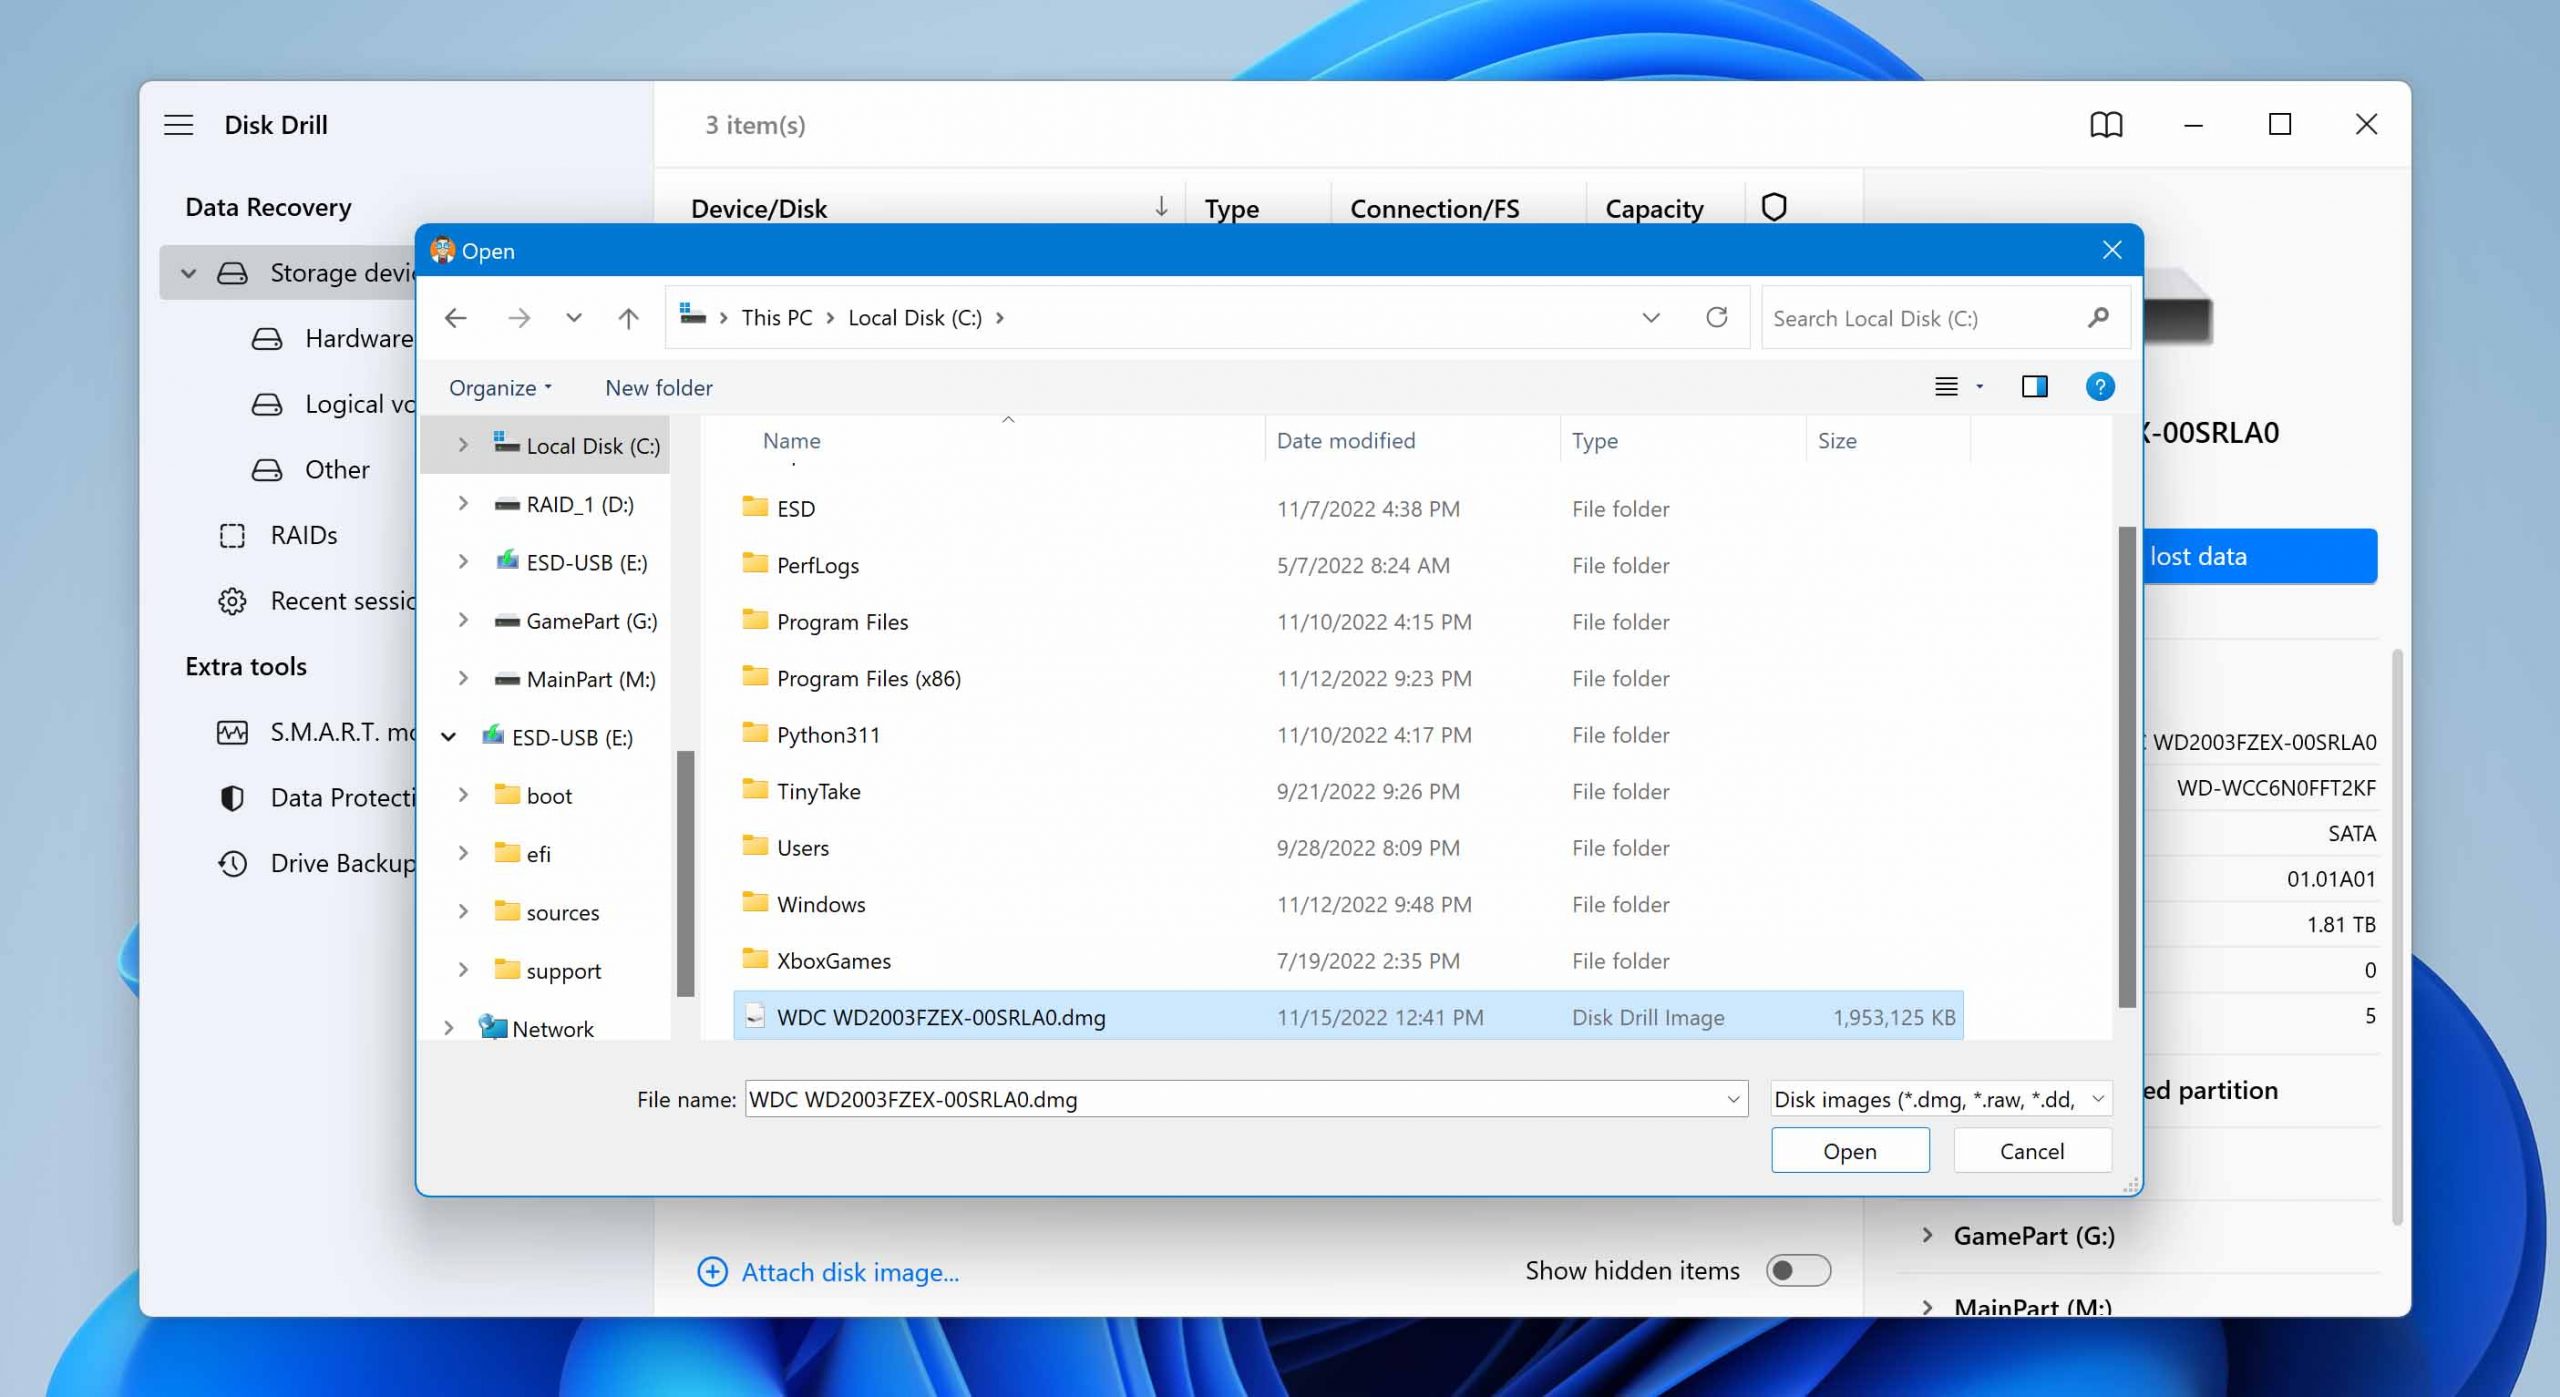
After backing up your hard drive, you can now safely perform data recovery through these steps:
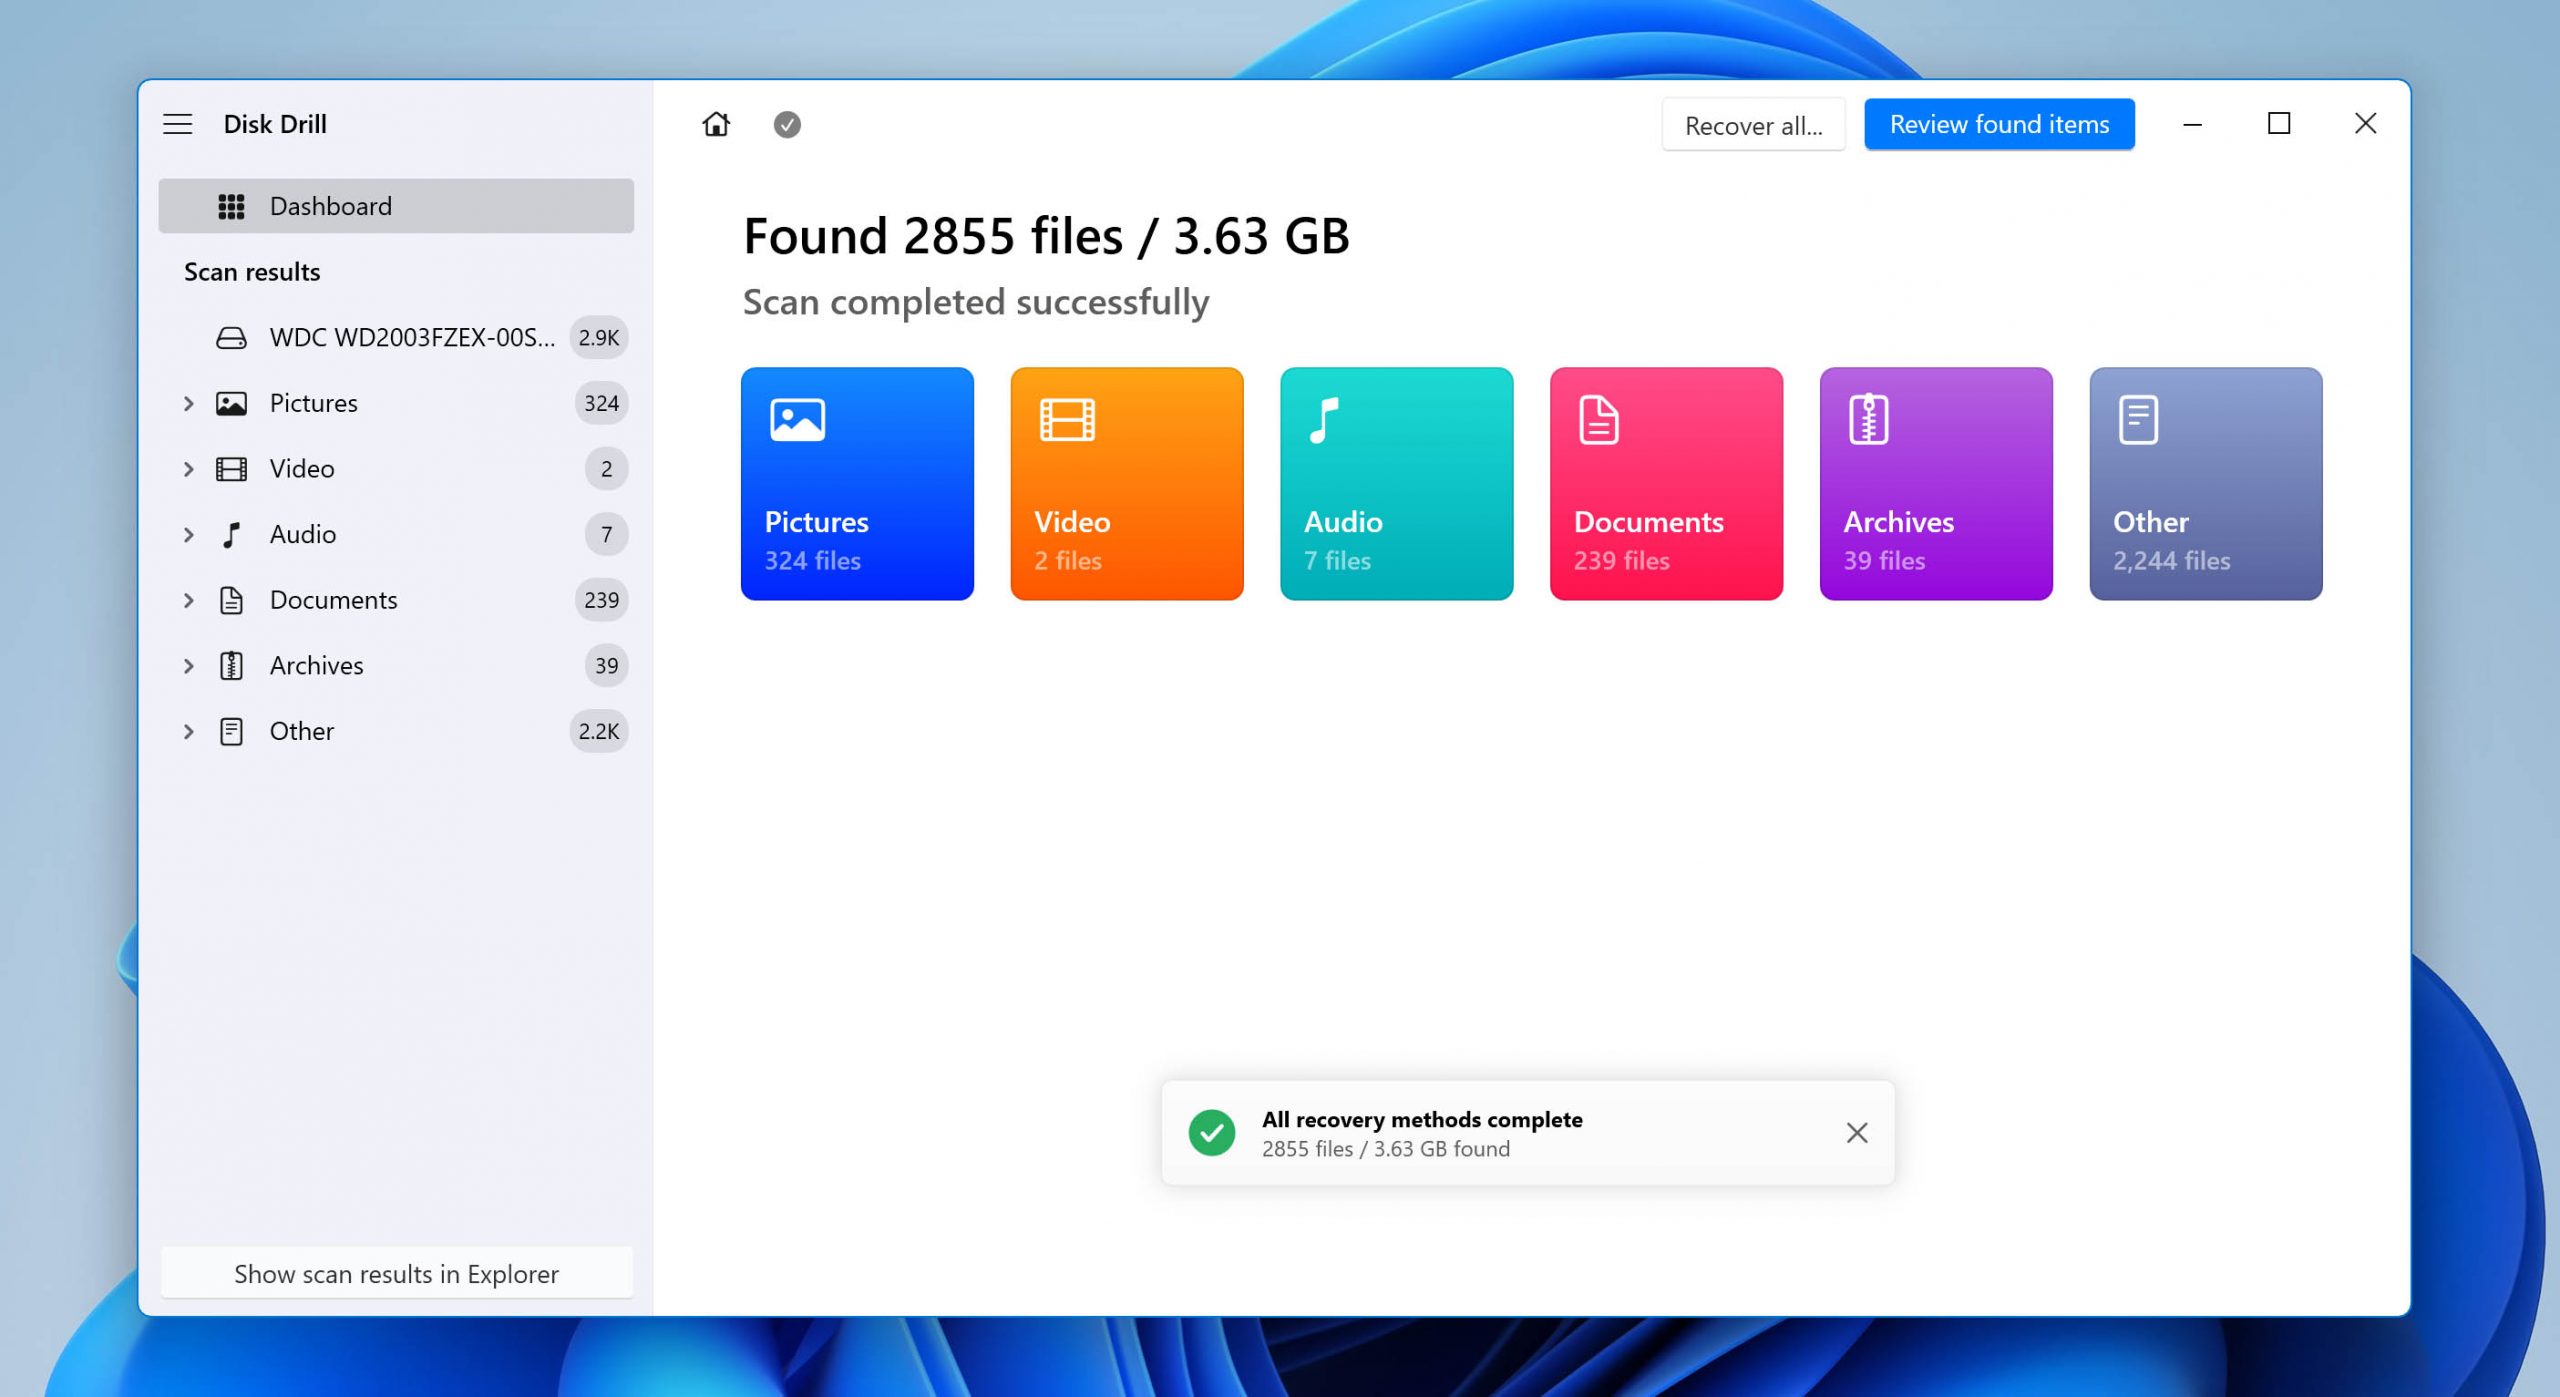
- Click on the Attach Disk Image option to browse the options and select your created backup.
- Next, select the disk image and click on the Search for lost data button.
- Upon clicking, the scan will start. You can check the scanned files by clicking on the Review found items button.
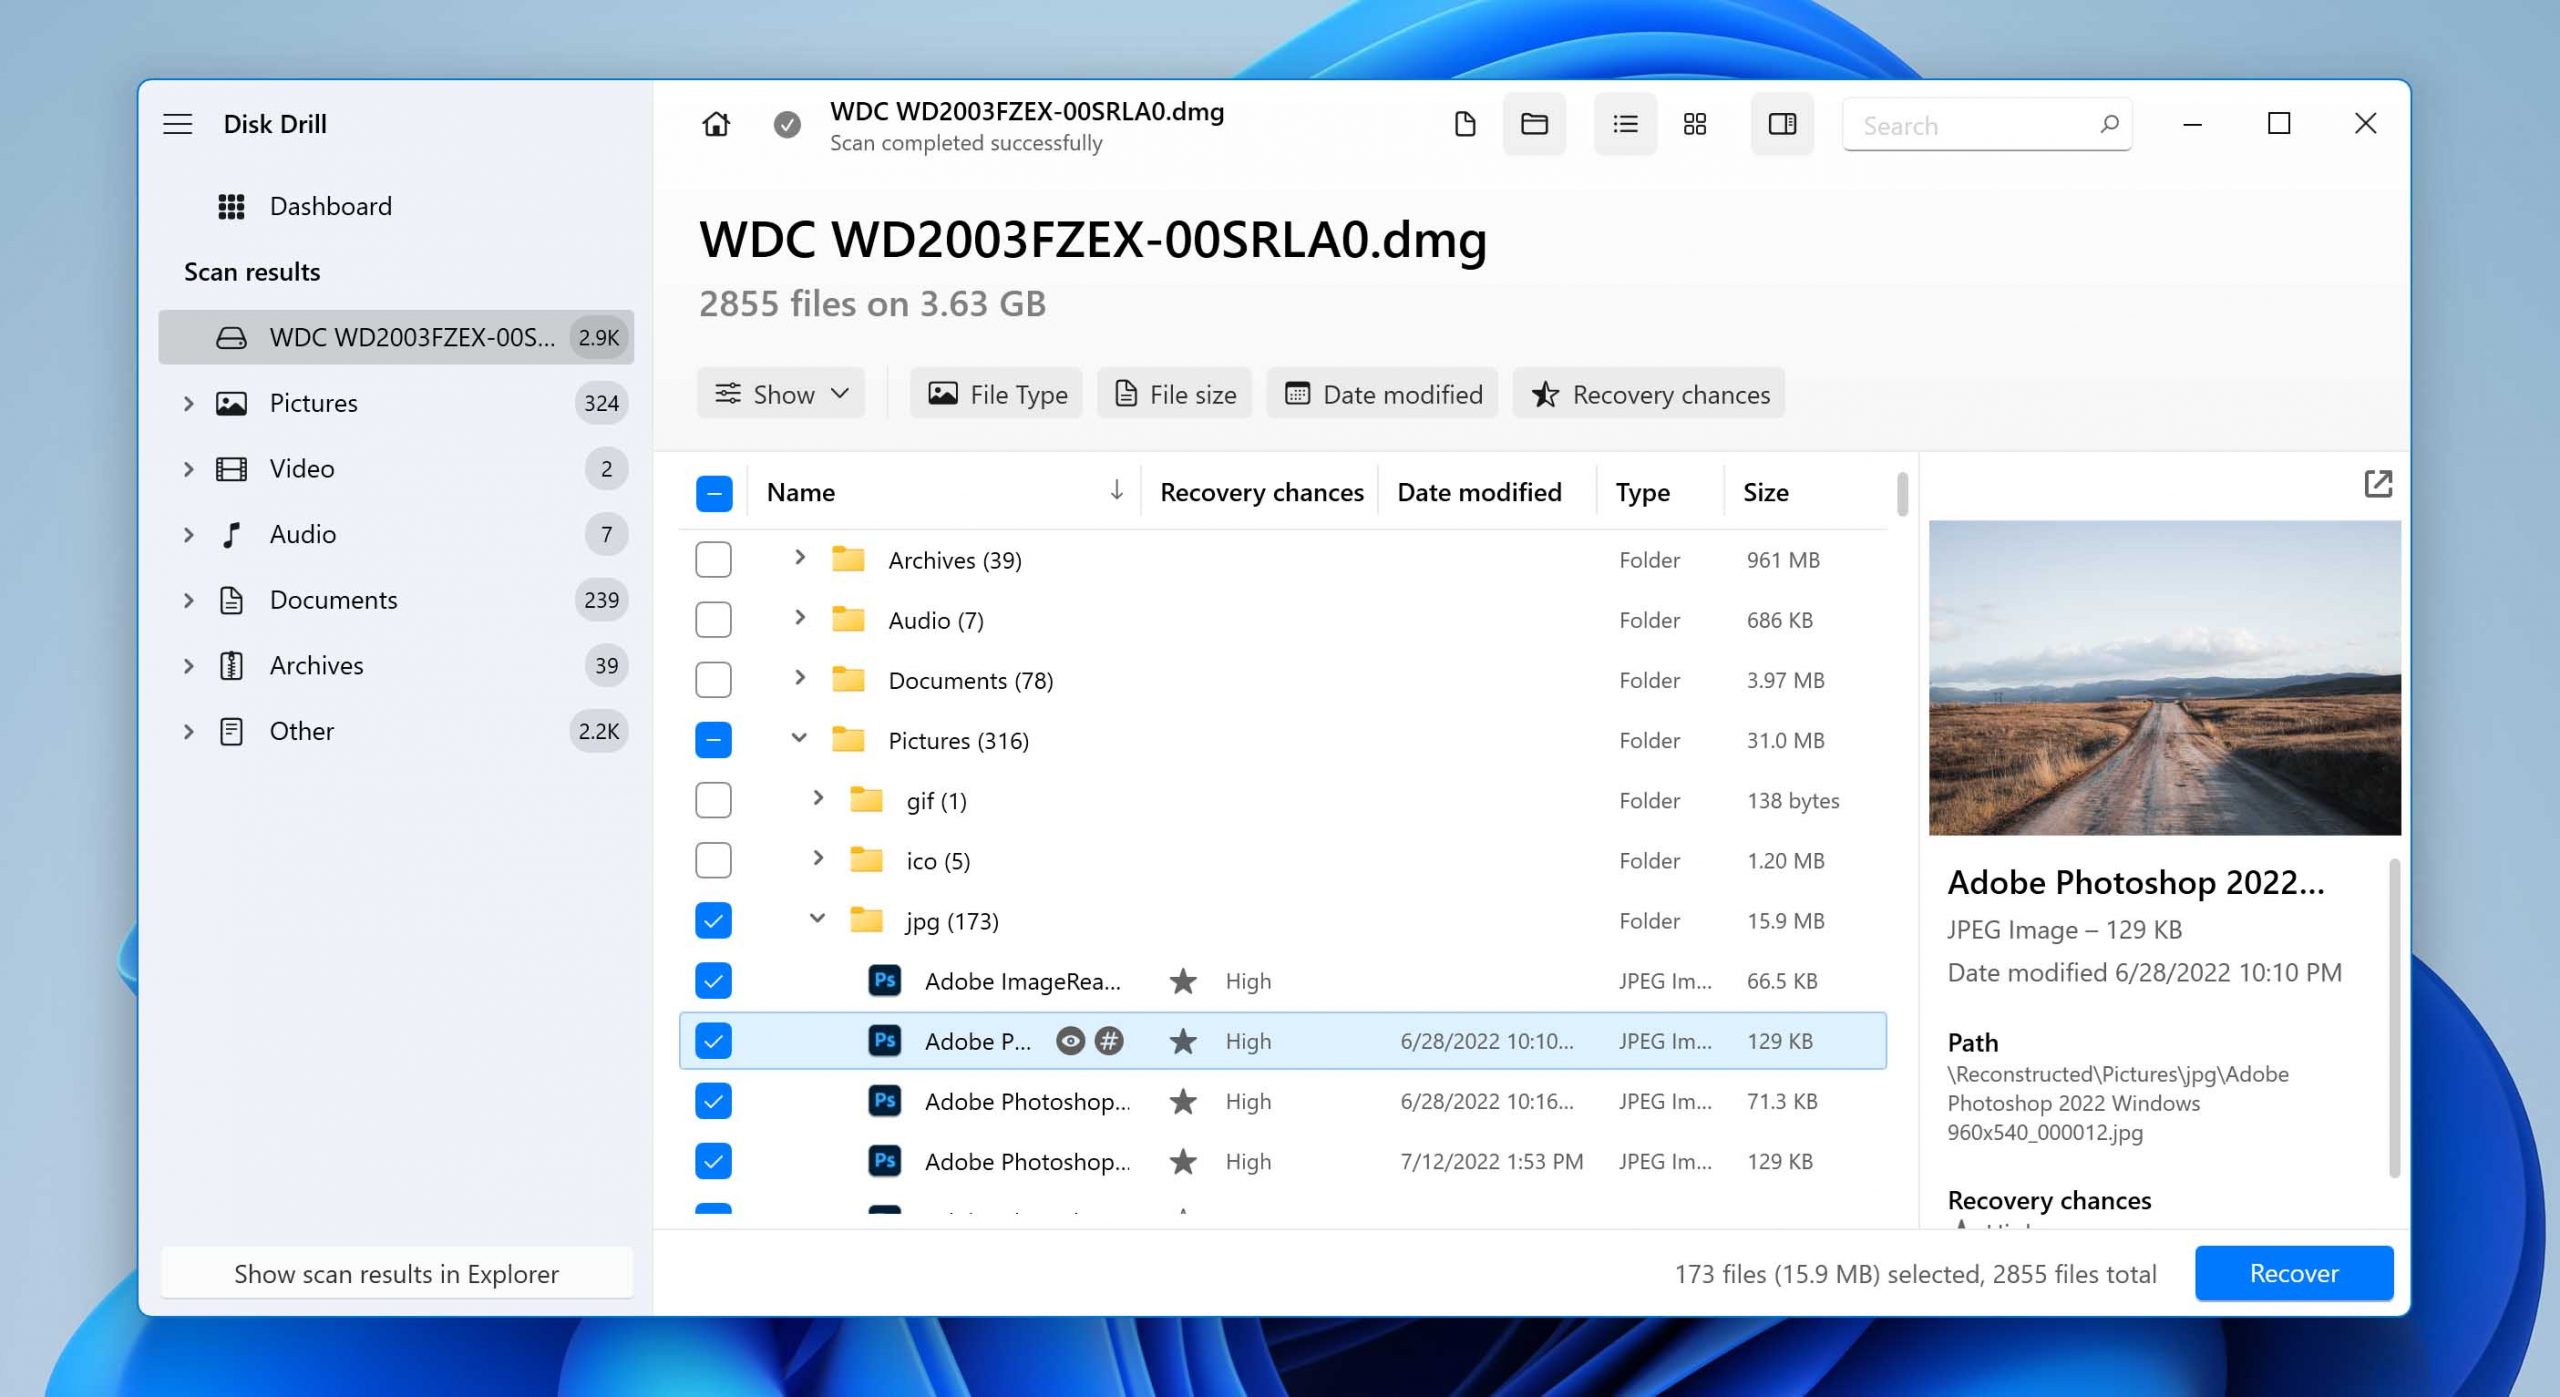
- After that, select the items you want to retrieve. Then, click Recover.
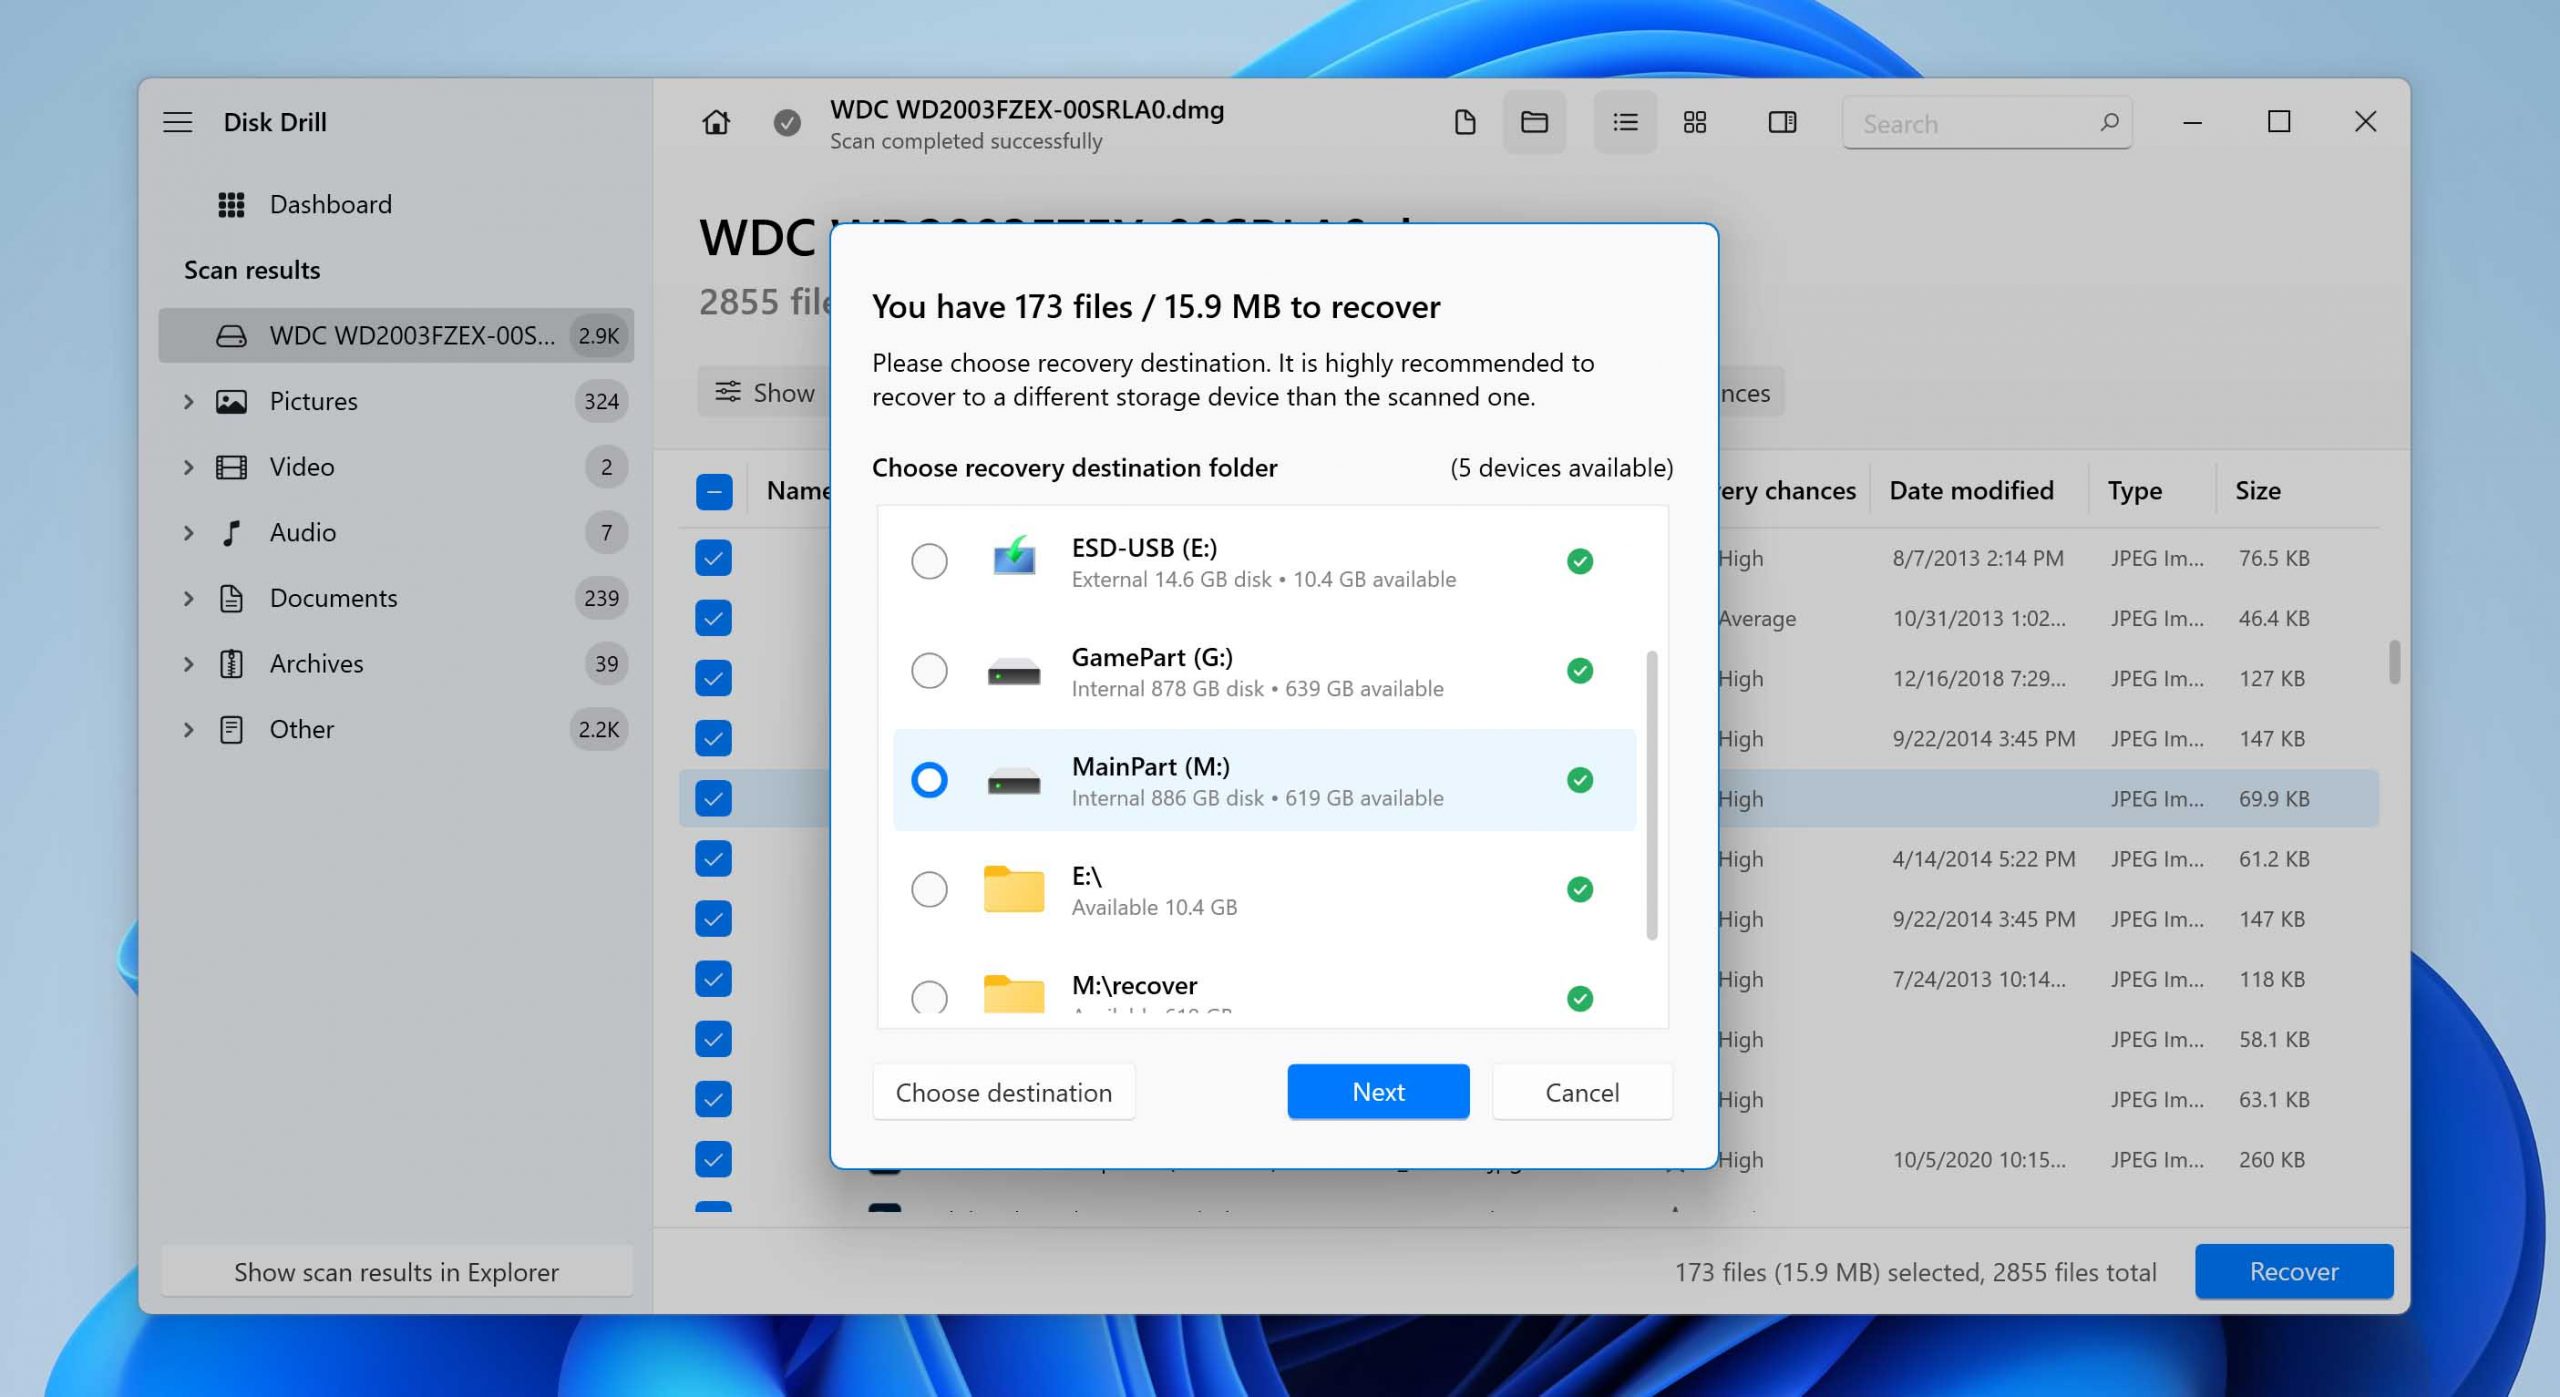
- Select the location where your files will be placed. Finally, press OK.
Try to Fix the Crashing Hard Drive With Disk Management Utility
Aside from the best hard drive data recovery apps on Mac and Windows, Disk Management Utility also provides a DIY approach to fix crashed hard drives and get back your lost files. Using this tool, you can extract the contents of your crashed hard drive to another hard drive.
Just remember that when transferring one drive to another, all your files from your receiving hard drive will be replaced by the one you’re recovering.
Here’s how to do it in different Operating Systems.
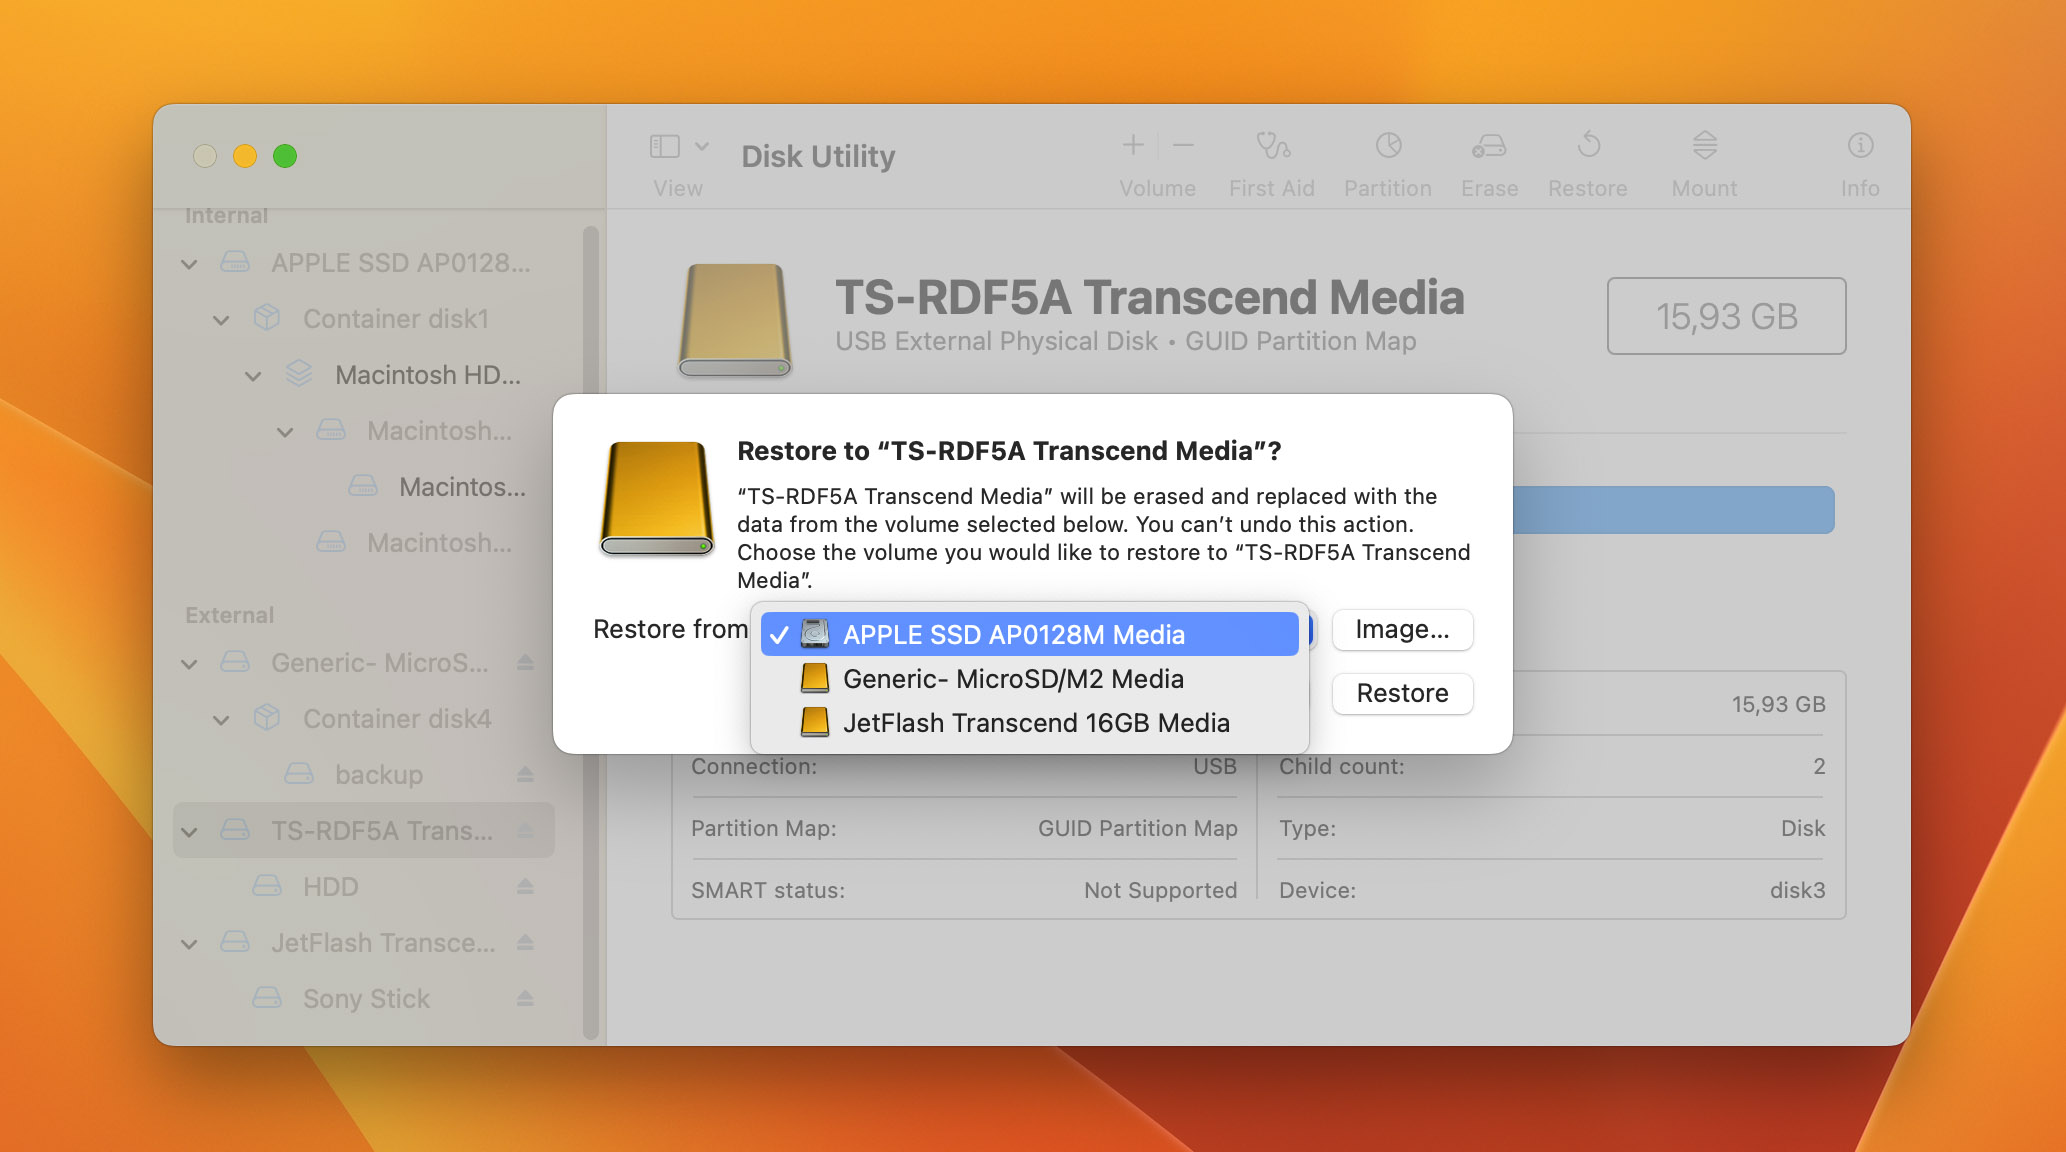
On Mac:
- To get started, open the Disk Utility App.
- Select View, then Show All Devices.
- Next, select the volume where you want your files to be placed by choosing the volume in the sidebar.
- Then, click the Restore button.
- After that, click the Restore pop-up menu. Then, choose the volume you want to copy.
- Finally, click Restore.
On Windows:
- First, open File Explorer.
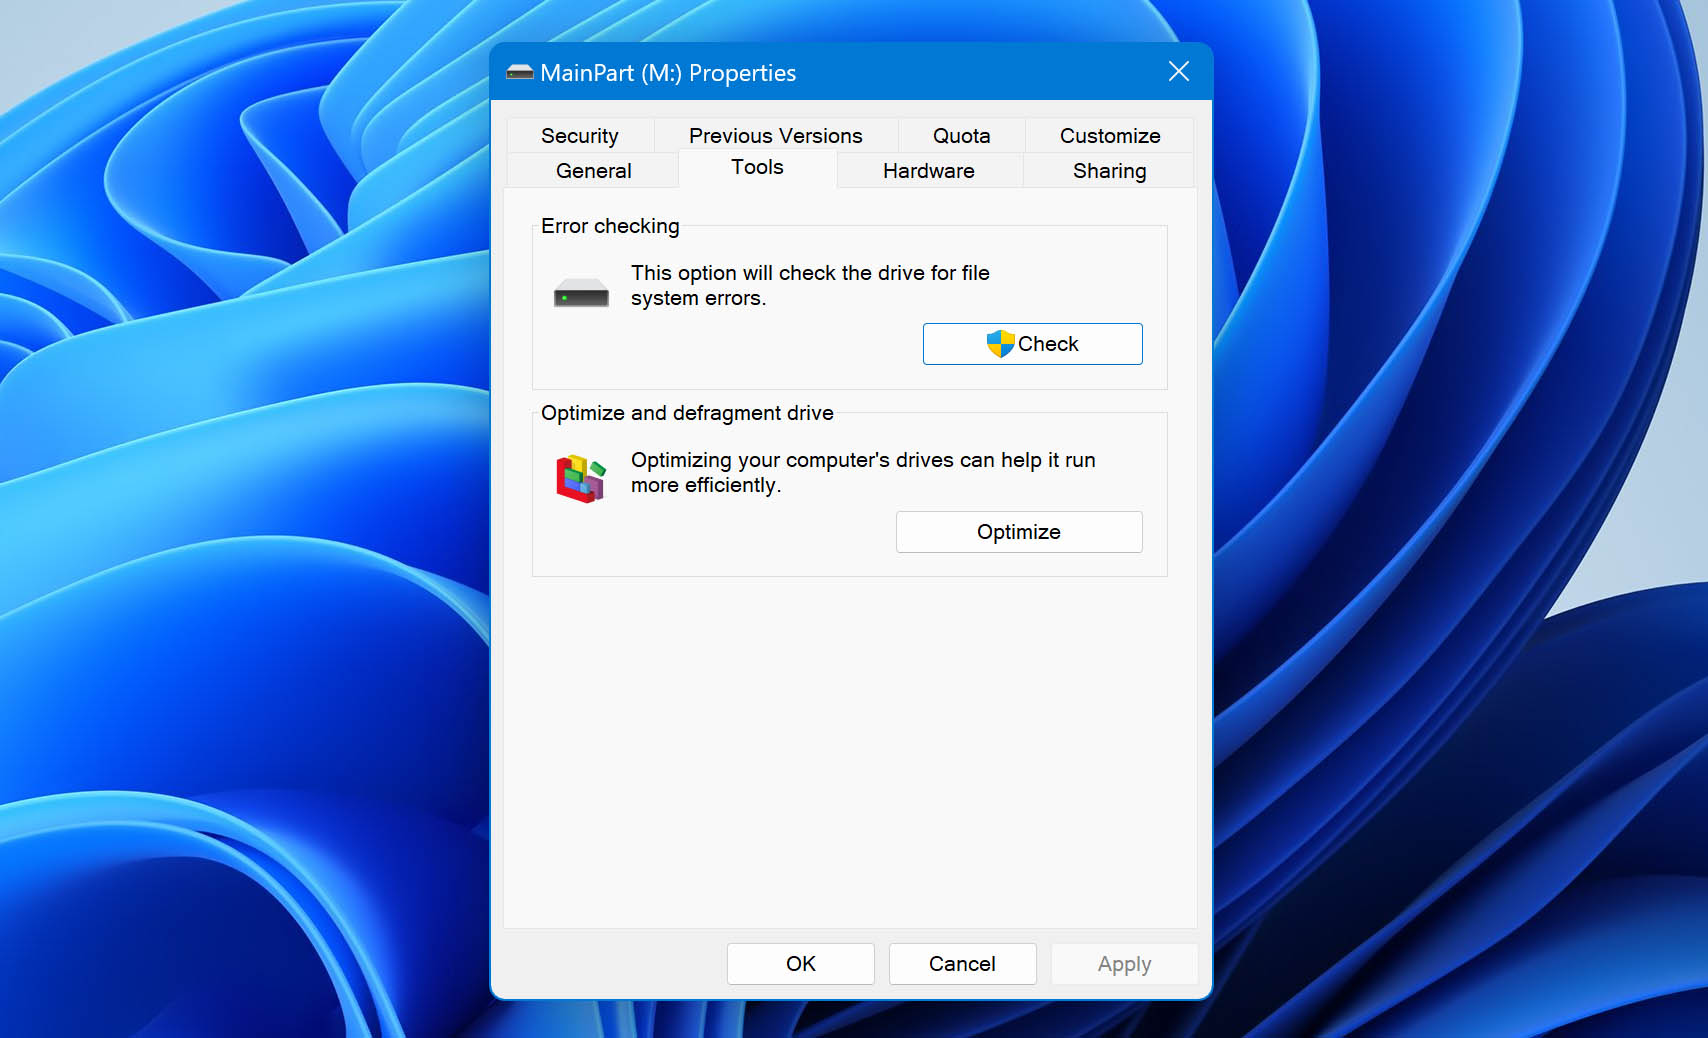
- Next, right-click the drive you want to check for errors. Then, select Properties.
- Navigate to the Tools tab on the Properties window.
- Start the scan.
- For Windows 11, 10, and 8:
Under Error checking, click on the Check button. Then, select Scan drive in the pop-up window. - For Windows 7, Vista, and XP:
Choose between Automatically fixing file system errors (automatically correct file system errors detected) or Scanning for and attempting recovery of bad sectors (find hard drive areas that may be damaged and prevent your computer from using those sectors). - Press Start
- For Windows 11, 10, and 8:
- Wait for the scan to complete. Afterward, follow the recommended fix instructions that Error Checking prompts.